
Jump to:
Ah, the classic and timeless French braid. I can’t think of a style that’s more iconic, elegant, and versatile than this. Read on to learn why it’s so unique, how to style it, and some things to consider before getting one.
The French Braid: A Timeless Classic
French braids are one of those iconic hairstyles that will never go out of style. They’re incredibly versatile – what other style can be appropriate at the gym, paired with a trendy outfit, and as the base of a bridal hairstyle?
A French braid can look polished and elegant when it’s braided tightly against the back of the head. It can look breezy and casual when it’s fluffed and tugged on (“pancaking” the braid) with a few face-framing pieces hanging loose in front.
French braids can morph into a sporty, vivacious style when twin French braids are plaited on either side of the head. They can even be worked into other hairstyles to add a twisted, intricate accent to a basic ponytail, bun, or loose hairstyle!
No wonder the humble French braid is a classic go-to hairstyle for women. But versatility isn’t the only reason this braided style is still so relevant.
There’s no denying that, simple as they may be, French braids just look gorgeous (when they’re done right). They tightly secure short, medium, or long hair out of your face with a more finished look than a ponytail or bun.
And among the many types of braids out there, the French braid is one of the easiest braids to master. We’re going to talk about French braids, look at some gorgeous inspo photos, cover some of the most common issues women run into with this braid, and share our best tips to craft the perfect French braid.
Ready to become a French braid pro? Let’s go!
What Is a French Braid?

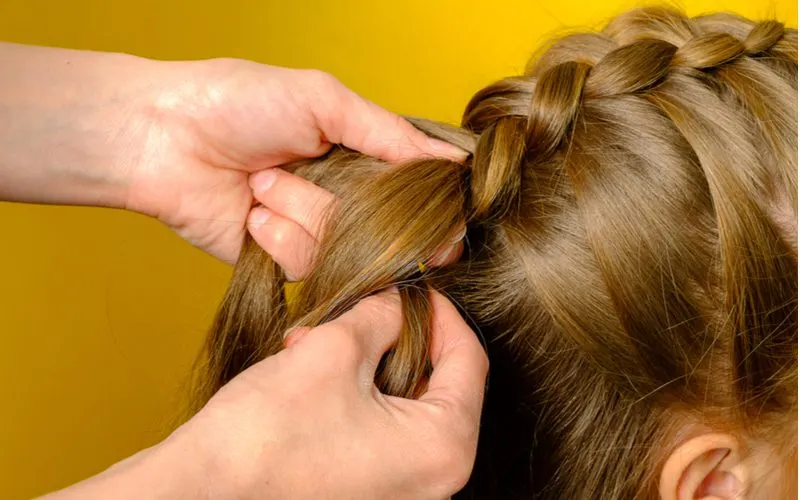
Evgeniy Agarkov/Shutterstock
French braids are a type of 3-strand flat braid that is affixed to the scalp instead of hanging loose. This attachment is achieved by picking up additional sections of hair while you braid (weave the 3 separate strands of hair over each other in a pattern).
As you weave a French braid, your original 3 sections will grow larger and larger as you continually pick up new hair with every pass. By the end of the braid, you will have woven all the hair on your head into the braid.
Depending on the length of your hair, you may need to continue braiding past the neckline to finish the ends. Once you reach the neckline, if there’s no more new hair to pick up from the scalp, you’ll just switch to a regular 3-strand braid without the added French braid step of picking up new hair.
The braid’s transition at the neckline will be seamless when you’re finished.
French braids can be intimidating for braiding beginners because they’re not quite as simple as a hanging 3-strand braid. There are more steps involved in forming the braid and securing it close to the scalp.
But once you’ve learned those steps, you’ll be able to French braid your hair with your eyes closed – though we wouldn’t recommend it.
The basics of French braiding are all you need to master. Once you know how to do the braid, you’ll be able to work it into other styles, try double French braids, experiment with different sized sections, and learn to do a similar Dutch braid.
Read Next: Types of Braided Hairstyles
Master the French Braid in 5 Steps

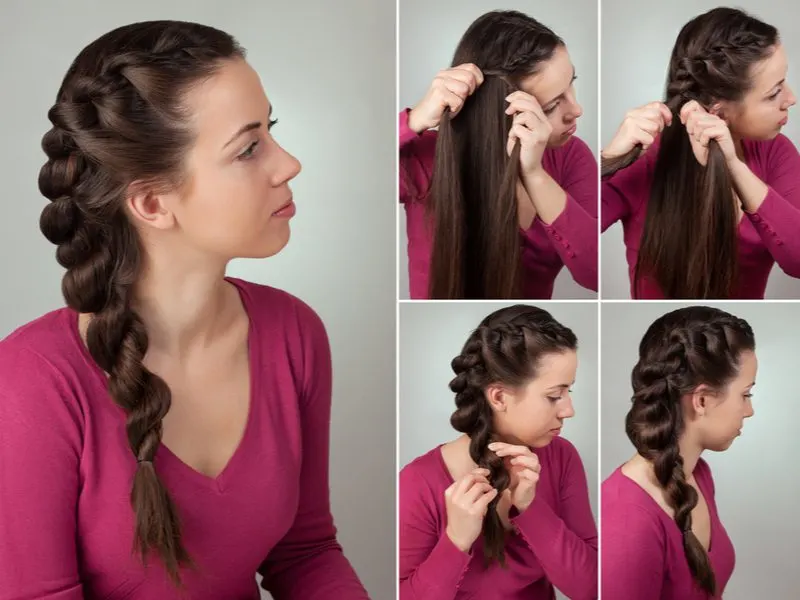
Alter-ego/Shutterstock
French braiding requires a little finger dexterity, smooth, dry, tangle-free hair, and the right tools for the job. Here’s what you’ll need to start French braiding.
French Braid Supplies
- Hairbrush
- Rattail comb
- Mousse
- Hair clip(s)
- Elastic(s)
The Basics of French Braiding
We’re going to talk about doing a traditional French braid – a single, flat braid that is woven and secured against the back of your head. Once you’ve mastered this basic braid, you can experiment with other French braid styles confidently!
Make sure your hair is long enough to braid – it has to be at least 2 inches long, but only experienced braiders can manage hair that short. Your hair should be at least 5 inches long to make learning the braid easier. All set? Let’s braid!
Step 1: Prep Your Hair
Start with clean, dry hair for the best-looking braid. Wet hair is more prone to breakage, is heavier, and tends to frizz as it dries in the braid.
If you have time to really prep, we recommend washing your hair, towel-drying gently, then working a small amount of mousse (or your favorite hair product with a little hold and frizz-fighting capabilities) throughout your hair.
Air-dry completely or use a hair dryer on the lowest setting to avoid damage.
Read Next: How to Use Dry Shampoo
Step 2: Create 3 Base Sections
Once your hair is moussed, clean, and fully dry, you’ll create your 3 base sections for the braid. These 3 sections or strands will start your French braid, and you’ll be adding more hair to them as you work.
Take a large chunk of hair from the top center of your head. You can take the section very close to the hairline if you have shorter hair, or take a larger section that extends to the crown if you have longer hair.
Hold it straight up and separate from the rest of your hair. Push your index and middle fingers backward into the section to create 3 general sections, or use the end of a rattail comb to make your sections more precise.
You want all 3 sections to be the same width and thickness for the braid. Hold the 3 strands between different fingers to keep them separate.
Step 3: Start Weaving the Braid
French braiding is just a repetitive process of passing the 2 outer strands over the middle strand. With each pass (after the first few), you’ll pick up a small amount of additional hair and tug lightly to pull the braid in close to the scalp.
For the first part of the braid, you won’t need to add any hair yet. Just take the outer left section and pass it over the middle section. Then take the outer right section and pass it over the middle section. This is a basic 3-strand braid.
Repeat this left-over-middle, right-over-middle process 2 or 3 times to form the base of your French braid.
Note: Keep each section gripped – you might find it helpful to hold one section with your left hand, and sandwich the other 2 sections between the fingers of your right. It’s important to keep all 3 sections separated and hold them tightly while you work.
Step 4: Start Adding Hair to the French Braid
At this point, you still have 3 sections – but now there’s a short length of braid above them. Starting with the outer left strand, use a free finger to draw a line against your scalp on the left side and pull this small new section of hair into the outer left strand.
Your left strand will now be bigger than the middle and right sections. This is where you can finally get some momentum going in the French braid.
Cross the bigger left strand over the middle and do the same thing on the right side – use a finger to section out a little more hair and pull it into the outer right section. Cross the right section over the middle and repeat the process again on the left.
Since you’re picking up more hair in each strand as you work, you’ll run out of hair to add after a few more passes. Now, all that’s left is managing the ends and finishing the braid.
Step 5: Finish the French Braid
Once you’ve braided in all the hair on your head, it’s time to finish the French braid. If your hair is medium or long, you may need to transition back into a basic 3-strand braid to finish the ends.
To do this, just keep hold of the 3 strands and finish braiding by passing the left section over the middle, then the right over the middle. Secure with an elastic when you’re about an inch or two above the ends.
You can also secure the French braid with an elastic at the nape of your neck or just below it and let the ends hang freely (think Dorothy’s twin French braids in the Wizard of Oz). That’s the beautiful thing about these braids – you can really tinker with the look to make it fit you!
Still not quite understanding the process and need a little extra guidance? Check out How to French Braid Your Own Hair before you continue reading. We’ll look at trendy variations of the braid and ways to play around with the style next.
6 Ways to Style a French Braid
Fluffy Pancake French Braid
Africa Studio/Shutterstock
Pancake braids are very on-trend and, thankfully, super easy to do. Try a pancake braid to give your hair the illusion of more thickness and density – it also keeps a French braid from looking too severe.
Once you’ve created your basic French braid and have secured it with an elastic, you’re going to do some tugging to create the fullness and volume boost that is a pancake braid. Start from the bottom of the braid for the most control over the look.
Start pulling gently on the braid, tugging the edges of the braid outward to make the braid appear a little more flat and wide.
Work your way up, loosening and tugging on the braid as you go. If you pull a few pieces loose, you can use a bobby pin to secure them back into the pancake braid.
Half-Crown French Braid
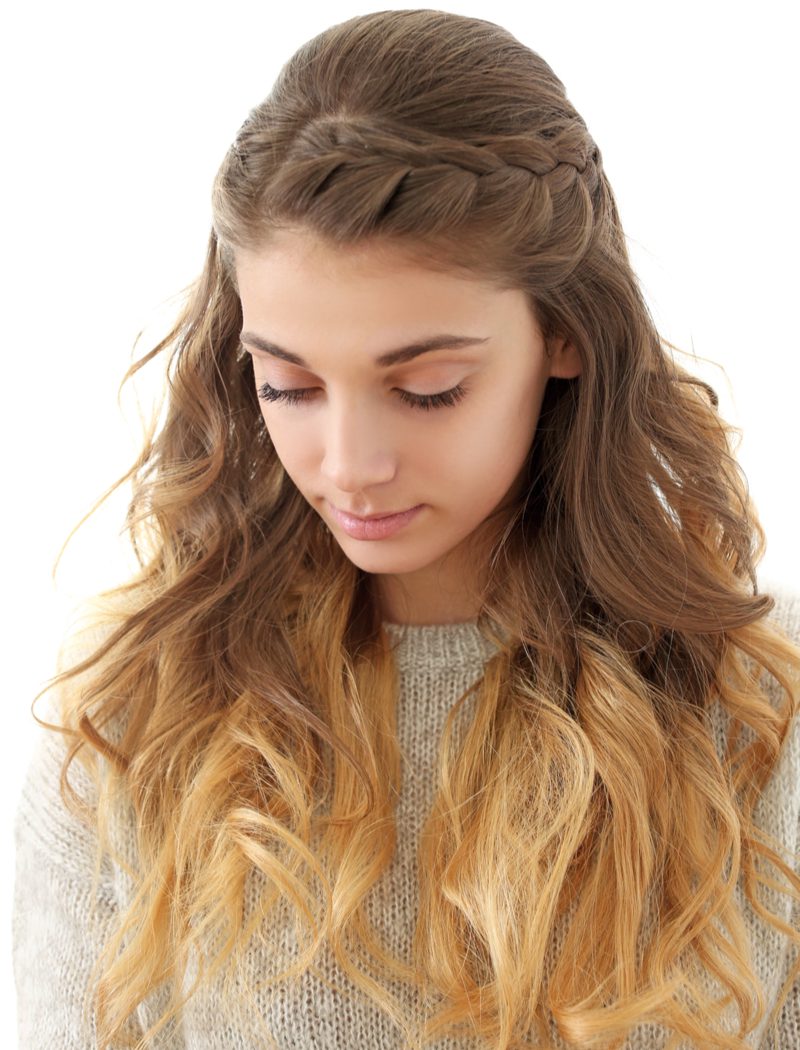
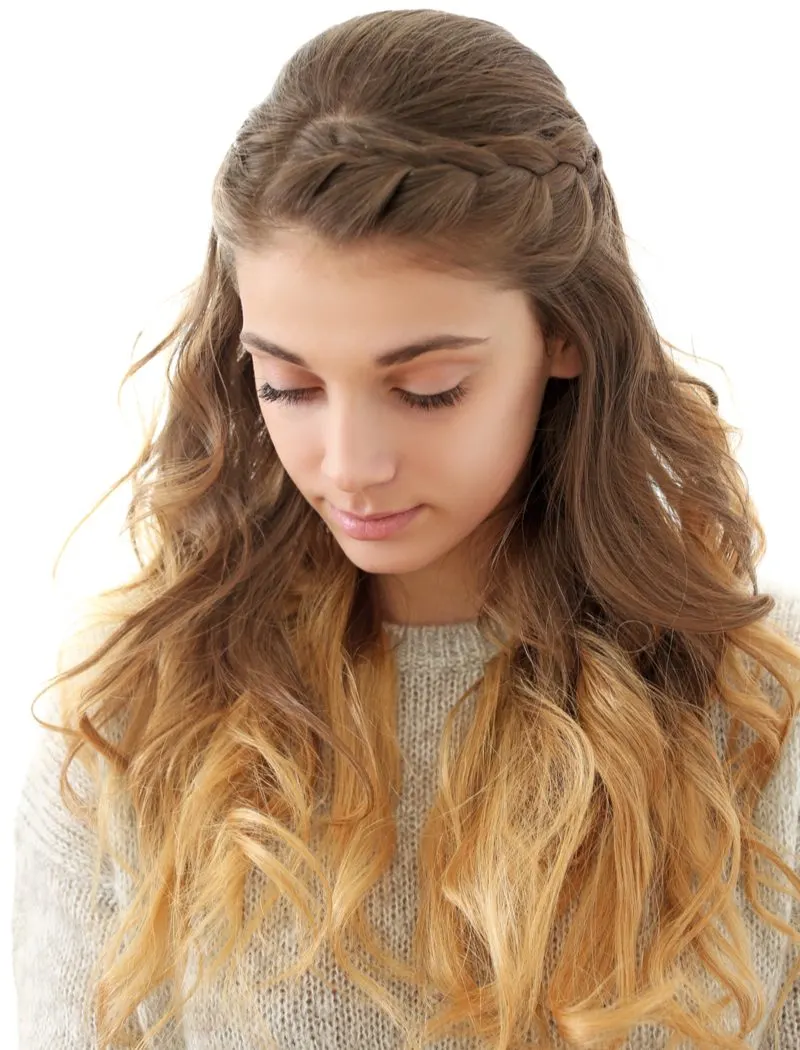
Africa Studio/Shutterstock
A half-crown French braid is a gorgeous option that can be an everyday look, but it’s stylish enough to wear for more formal events, too. This type of French braid doesn’t involve the entire head, so it’s a lot easier and less time-consuming to create.
Start by taking a section about 2 inches wide from the front hairline. Begin the braid where you’d do a deep side part. Create 3 equal sections from the portion of hair you just grabbed. Pass the outer left section over the middle, then pass the outer right section over the middle.
Grab a small strand of hair from below the braid and pull it into the outer left section, making sure you don’t pull in hair outside of this roughly 2-inch zone.
Repeat this process for the outer right section – pulling in more hair within this 2-inch section – and continue working until you’ve reached the ear on the opposite side you started from.
Finish the ends in a basic 3-strand braid and secure with a small elastic, or secure with an elastic, curl the ends, and curl the rest of your hair to blend the style in.
Bridal French Braid

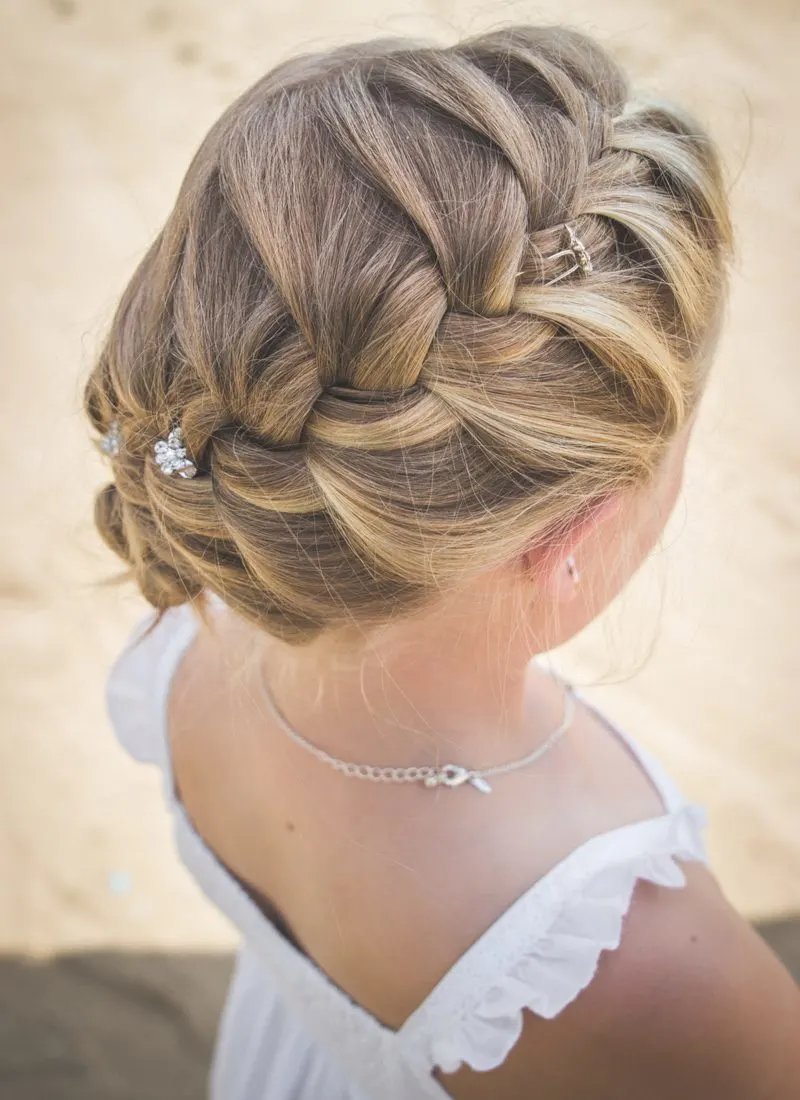
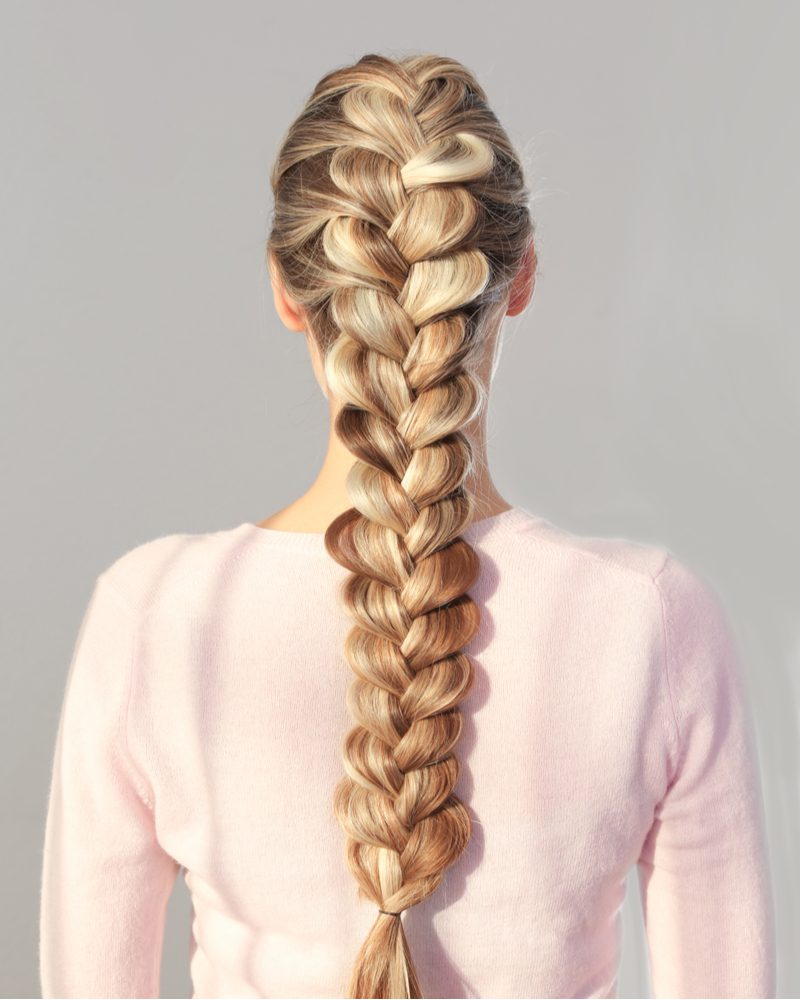
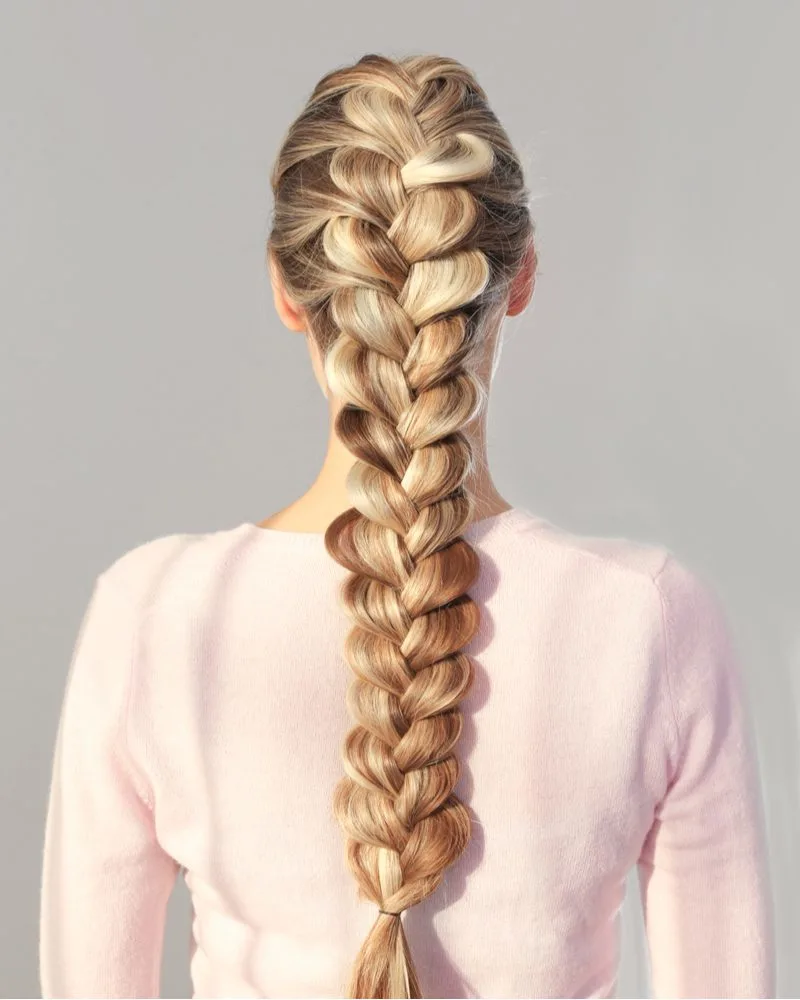
Qualivity/Shutterstock
French braids are perfect for brides – they’re practical and keep the hair perfectly secured, won’t fall out during the activities of the big day, and are easy to accent and accessorize to match your wedding theme.
Bridal French braids are typically traditional French braids, but this example really inspired us because the braid is diagonal with a soft curve in it. This brings a gorgeous, feminine softness to the style that is just perfect for a wedding.
To create a bridal French braid like this, just make a few tweaks to the basic French braid. Instead of grabbing your initial section from the top middle, grab it closer to the side.
As you braid, change the angle of your hands to bring the braid closer to the middle after you’ve woven 4-5 sections. This will softly curve the braid.
Finish by securing the ends with an elastic and tucking them under at the nape of the neck, securing with bobby pins. Add small metallic, pearl, or floral accents to coordinate your hairstyle with your wedding theme or dress.
Read Next: Wedding Guest Hairstyles
Half-Up French Braid Top Knot
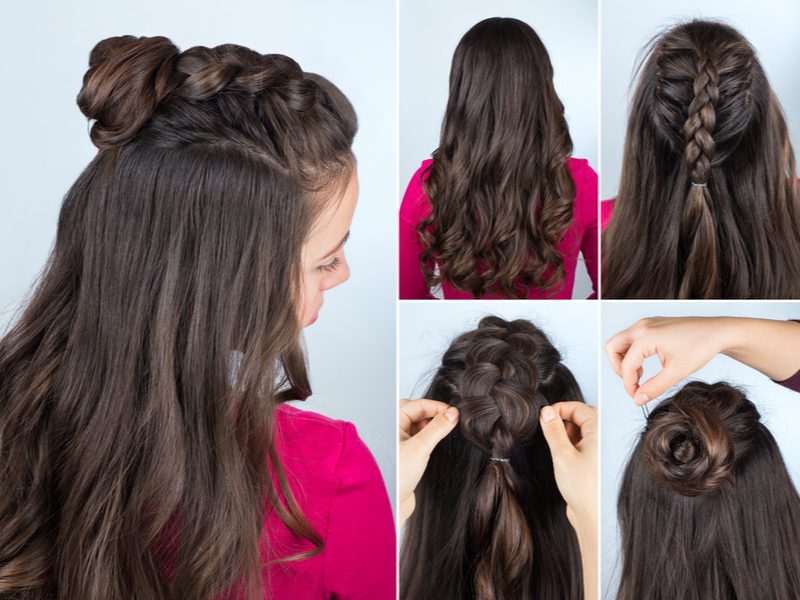

Alter-ego/Shutterstock
This is one of the cutest ways to rock a French braid without doing a full, traditional braid. We love a good French braid top knot! This style will only take you about 5 minutes to complete, but it looks intricate and polished.
Begin like you’re doing a traditional French braid, but leave the furthest parts on both sides out of the braid. You’re concentrating the French braid in the top middle, leaving all the other hair on the sides out. When you’ve reached the crown, secure the braid with a small elastic.
Tug on the braid to make it fuller, then wind the ends of the braid into a twist and coil it into a bun. Secure the bun with a few strategically placed bobby pins. Finish styling the rest of your hair as desired – we love the way casual waves look with this style.
Double Dutch Braided Pigtails
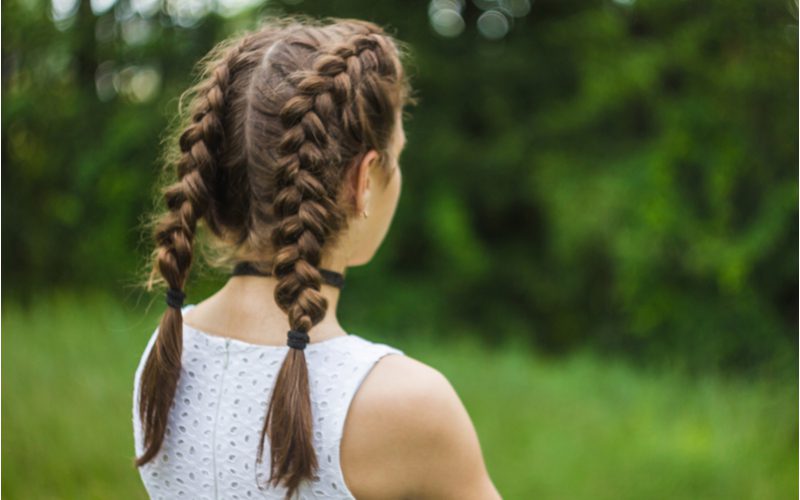

zheka0210/Shutterstock
The Dutch braid is done by weaving the outer sections of the braid under the middle section, whereas French braids involve weaving the outer sections over the middle section. This makes the braid “sit up” on top of the hair and appear more prominent.
Split your hair into 2 equal sections and repeat the Dutch braid process to try this look. Grab the top portion of one half and divide it into 3 sections. This is the general dutch braid process:
- Pass the outer left section under the middle section
- Pass the outer right section under the middle section
- Grab a little more hair from the side and add it to the outer left section
- Pass the left section under the middle
- Grab a little more hair from the opposite side and add it to the outer right section
- Pass the right section under the middle
Repeat this process until all your hair has been incorporated into the first braid. Repeat for the opposite side and honey, you are Double-Dutched!
Dutch Braided Space Buns
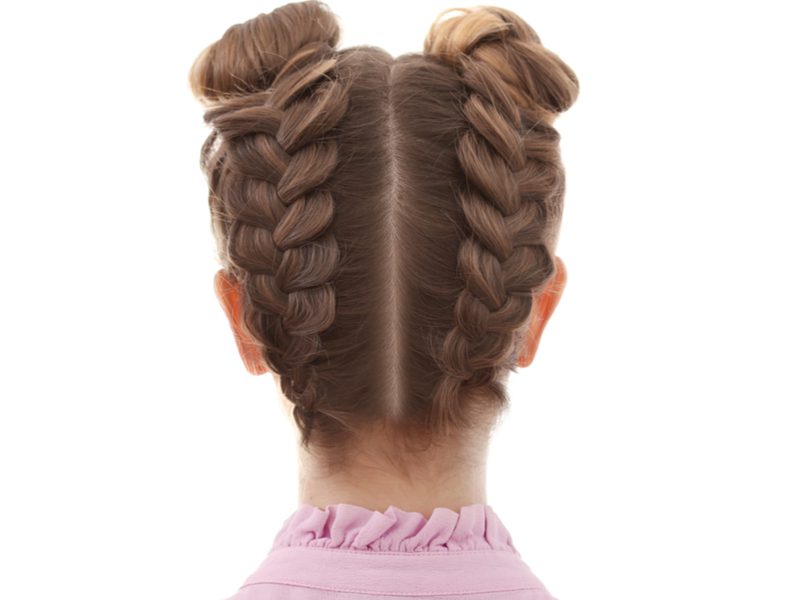
Africa Studio/Shutterstock
Space buns are always fun, but adding Dutch braids to the back gives this style a modern and intricate twist. These Dutch braids are done just like we walked you through above – you pass the outer sections under the middle, not over, to create a Dutch braid.
But unlike the Dutch braid pigtails we showed you, these Dutch braids are done upside-down and on the back of your head. It’s impossible to see what you’re doing and you’re working by muscle memory alone.
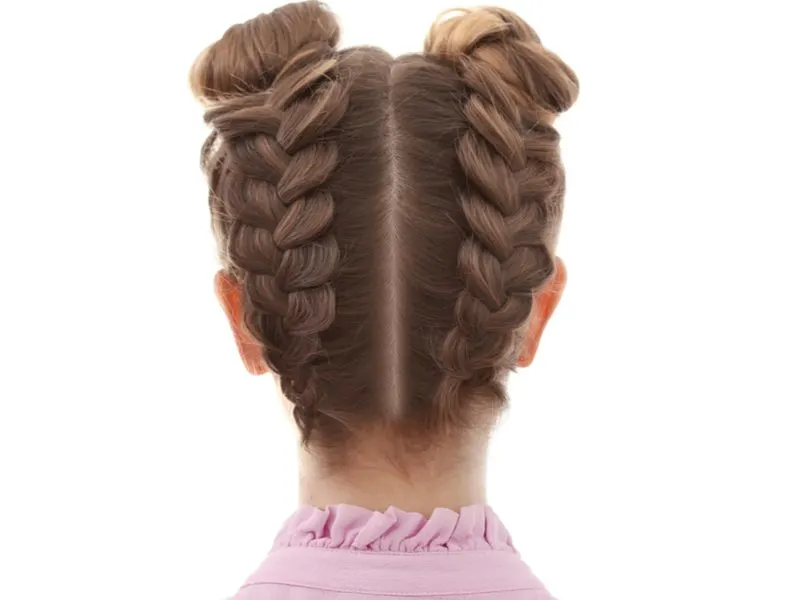
This is not a braid style for beginners! But once you’ve nailed the Dutch braid (basically a reverse French braid), you may find this challenge right up your alley! If you feel up to giving it a try, hang your head upside down and divide your hair into 2 equal sections by making a middle part.
Secure one side with a clip. Take the very top of the free side – the “top” will be at the neckline – and divide it into 3 sections. Braid in the Dutch pattern, passing the outer sections under the middle and grabbing more hair as you go.
When you reach the crown, secure the braid with an elastic and twist the ends around before securing with another elastic. This creates your first braided space bun. Repeat for the other side, and pull out a few face-framing pieces if desired.
Frequently Asked Questions
French braiding is a challenge for many beginners to learn, but once you experiment with the process and learn the answers to the most common questions about this classic braid, you’ll be a master in no time.
Here are the questions we get the most about French braiding:
How long can you leave a French braid in?
French braids can last 3-4 days if they’re done tightly and protected at night. Your French braid can last much longer than 4 days, but since it’s a single braid that incorporates all the hair on your head, it’s easy for pieces to fall loose over the course of a few days.
Doing 2 or more French braids can extend the wear time because each braid will stay tighter.
By day 4 with a traditional single French braid, you’ll likely have a significantly looser braid with additional frizz and flyaways. You’ll want to take your French braid down and wash and dry your hair after day 4. You can always braid it again if you’re loving the style!
Read Next: How to Get Rid of Frizzy Hair
How do you hold your hair while French braiding?
Figuring out how to hold all 3 sections of hair while French braiding is the most challenging part of learning this braid. It’s one of those things that you need to see in action to fully understand.
Experienced braiders often come up with their own techniques to hold all 3 strands separate, but a great, basic technique to learn is keeping one hand free.
If you can learn to curve your fingers and hold all 3 strands in one hand, you’ll have the other hand free to grab additional hair and integrate it into the section you’re working on. This video does a great job showing the technique in action.
Should you French braid hair wet or dry?
While you can French braid hair wet, it’s a better idea to braid dry hair. Why is that? Wet hair is at its weakest point because it becomes much more elastic and stretchy while wet. It’s easy to overstretch strands and snap them while you braid.
Braiding wet hair also tends to make the hair frizzy as it dries, so while you might end up with some nice heatless curls by French braiding wet hair, it could also end up a frizz-fest.
How do you keep French braids neat overnight?
Sleeping in French braids can lead to a lot of frizz, flyaways, and loose pieces falling out of the braid. How can you keep your braids neat overnight if you want to wear them for a few days? A silk or satin scarf or bonnet is the answer.
Wrap a silky scarf around your head from the nape of your neck upward, ensuring the ends of your braids are tucked up inside the scarf. Tie the scarf at your hairline and ensure it’s tight.
If your braids are very long, you can also individually wrap the braids with another scarf and secure the ends with an elastic over the scarf.
Alternatively, you can buy a satin bonnet that is made just for this purpose – it just slips onto your head and envelopes your braid(s) to keep them tight, frizz-free, and protected while you sleep.
Try These Tips for the Perfect French Braid
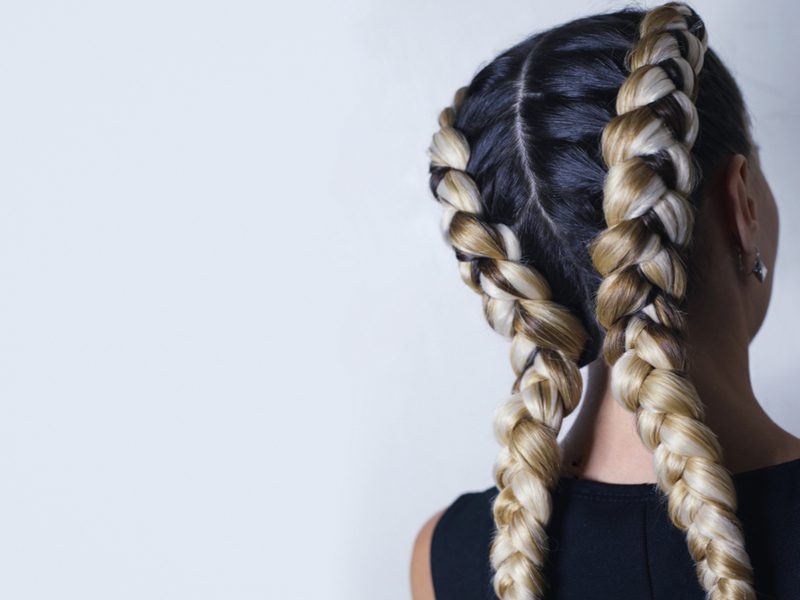

Gorgeoussab/Shutterstock
- Keep your fingers close to your scalp for a tighter braid. Holding your hands too far away from your head while you work will always result in a loose and uneven braid. You’ve got to work close to the scalp to create a tight, secure braid. The closer you hold your fingers to your scalp, the tighter the braid will be as you work – and the less cinching you’ll have to do as you go to keep it secure.
- Lightly cinch the braid as you work to avoid a messy braid. If you’re a beginning braider, you may be surprised to see that while you’re nailing the general pattern of the braid, your end result looks super loose and not secure. If this happens to you, you probably didn’t cinch the braid as you worked. After each “stitch” in the braid, tug your hands apart gently but firmly to keep the braid cinched tight and close to the scalp.
- Take smaller sections for a more intricate, polished braid. While your initial 3 strands can be as thin or thick as you want, size matters when it comes to the part of adding hair in. As you start pulling in hair from each side, taking smaller sections with each pass will give the braid a more intricate and polished look. The smaller the sections you take, the more time it will take to braid and the thinner the braid “stitches” will be. The larger the sections, the quicker the braid and bigger the stitches.
- Rely on products to keep thin or fine hair braided securely. If your hair has trouble staying in a tight braid because it’s very thin or fine, you’ll want to enlist the help of a few hair products to help your braid stay put. A light spritz of dry shampoo or hairspray will give your strands extra grip, while products like mousse (perfect for fine or thin hair) add grip and texture for a tighter hold.
- Practice on yourself and others. Braiding your own hair is much more difficult than braiding someone else’s. You’re doing the motions while facing a mirror, where everything looks backward. And if you’re braiding down the back of your head, it can be almost impossible to see what you’re doing! So if you really want to master the art of French braiding, you’ve got to get in lots of practice until it becomes second nature. Practice on your own hair as often as you can, watch YouTube videos to try different techniques, and practice braiding on others’ hair whenever you can.
French braids are simple at heart – you’re sectioning off 3 strands that slowly incorporate all of your hair as you weave your merry way through the hair.
If you can master the art of holding all 3 strands separate while you pick up and add in a little more hair with each pass, you’ll be an expert French braider in no time.
We’ve talked about the French braid’s characteristics and features, walked through the process of doing a French braid, and looked at some gorgeous, trendy examples of this classic flat braid.
After reading through the FAQ and learning some of our best tips for nailing the perfect French braid, we’d say you’re already well on your way to master braider status!