
Jump to:
From beachy waves to defined ringlets, we’ve got 10 tried-and-true ways to get heatless curls that last all day. Check out the process for the trendy no-heat curl techniques you’ve heard of and a few new ones you’ve got to try.
What Are Heatless Curls?

Samoli/Shutterstock
Starting to take better care of your hair and swearing off the infernal heat of the curling iron for a while? Good for you! I’m right there with you on the journey to improving hair health and reducing daily damage.
Heatless curls are one of the best ways to sidestep bad hair days and avoid reaching for the hair-torching hot tools.
I used to think of heatless curls as kind of a novelty. It was fun to try the TikTok robe curls and experiment with twisting my hair into tiny space buns before bed to create voluminous ringlets.
But the curls and waves I got from my no-heat trial runs were a little wonky and didn’t inspire a lot of confidence in heatless curling techniques. But like Maya Angelou said: “Do the best you can until you know better. Then when you know better, do better.”
Turns out, perfecting heatless curls is totally possible – it just requires mastering a few easy techniques. And it’s so much better for your hair both short-term and long-term. I believe every woman should have a few go-to methods to create curls without hot tools!
After years of dealing with split, dry ends, fragile, easily-broken strands, and more hair fall than I ever expected before age 30, I knew I had to do something different.
Heatless curls have turned out to be my saving grace now that I’m limiting my hot tool usage and taking better care of my hair. You’re going to love them, too. I think it’s important to have a range of heatless styling options to turn to.
If you don’t have a variety of ways to style your hair sans heat, you will always turn to the curling iron, curling wand, or flat iron when you need to style your hair.
How to Curl Hair Overnight Without Heat:
- No-Heat TikTok Robe Curls
- Heatless Coiled Bun Curls
- Heatless Mini Bun Curls
- Overnight 3-Strand Braid Curls
- No-Heat Rope Braid Curls
- Heatless Bubble Braid Curls
- Twist and Clip Heatless Curls
- Heatless Headband Curls
- No-Heat Pin Curls
- Old School Rag Curls
Heatless curls should be more than a novelty technique we use once or twice because we saw it on TikTok. If you like to wear your hair wavy or curly and want to avoid causing heat damage to your strands, heatless curls need to be a key part of your hair styling repertoire.
The 10 methods I’m going to show you next will make it simple to swear off hot tools while achieving gorgeous curls and waves with excellent holding power. Check it out!
Read Next: Types of Curls and The Curly Girl Method
Heatless Curls 10 Ways: Our Favorite No-Heat Methods
Each one of the no-heat curling methods below will create a different type of curl or wave. So get ready to experiment with these techniques and see which ones deserve a spot in your weekly styling repertoire!
No-Heat TikTok Robe Curls
This is one we’ve all seen and heard about – the TikTok robe curls! Originally, the idea was laying a robe belt horizontally across the head and wrapping hair around it on each side to create spiral curls. Some users found that folding the robe belt in half made it thicker and created bigger, looser curls.
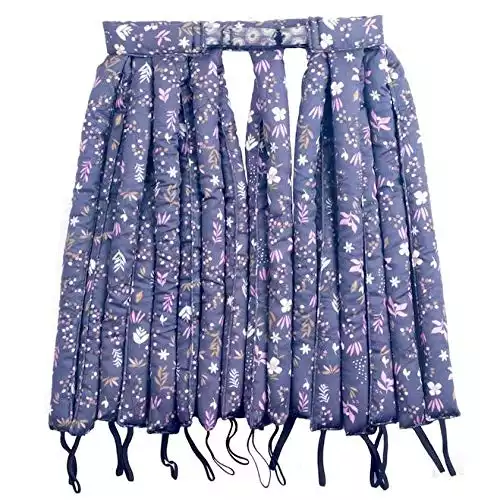
It didn’t take long for companies to start manufacturing products that mimic the robe belt but are much more convenient to use (and create more uniform curls).
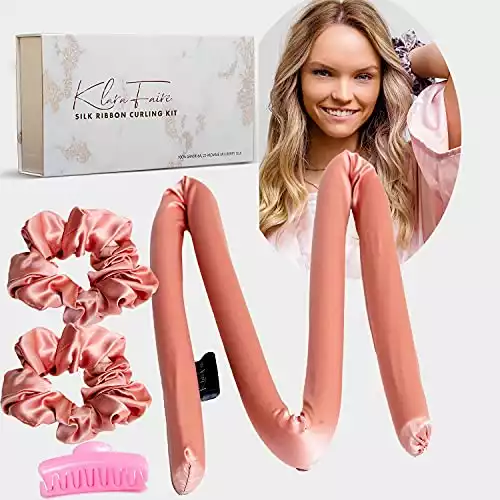
I ordered a heatless curl headband set from Amazon to try it out and fell in love with the results. My kit came with the curling “headband” (more like a long foam rod), 2 scrunchies to secure the ends, and a claw clip to keep the rod in place on top of the head.
Here’s how to create these TikTok-famous no-heat curls the traditional way or with a kit:
You’ll Need: Robe belt OR heatless curling rod kit; curl-enhancing hair product; 2 scrunchies; claw clip (optional)
- Brush and prep your damp hair with mousse, gel, or curl cream to help encourage lasting curls. Create a center part for the most even curls.
- Lay the robe belt (folded in half lengthwise) or foam rod horizontally across your head an inch or two back from the hairline. Secure with a claw clip for more stability as you wrap the hair.
- Starting on one side, begin wrapping your hair around the belt or rod, taking care to keep the hair smooth and untangled as you wrap. Repeat for the other side.
- Secure each fully wrapped side with a scrunchy or large elastic around the ends of your hair and the belt or rod (it’ll help prevent kinks in the hair). Remove the claw clip.
- Leave your hair in this setup until the morning. Remove the scrunchies and slowly unwrap your hair to reveal your no-heat curls!
Heatless Coiled Bun Curls

Nursaza Lily/Shutterstock
Coiled buns are so easy to do and that makes them one of my favorite methods for getting quick, reliable curls without heat. A coiled bun starts with a ponytail, then the hair is twisted until it starts to coil back on itself. It forms a spiral shape that creates loose spiral curls.
The longer you leave a coiled bun in place, the longer your curls will last. And it’s important to note that you can do this method with either damp or dry hair.
Bun curls done on damp hair that is allowed to fully dry will be longer-lasting. But if you have super thick or low porosity hair like me, you know that it doesn’t always dry fully overnight.
To get around this issue, I like to do bun curls with 80% dry hair. Here’s how to get great coiled bun curls with no heat:
You’ll Need: Curl-enhancing hair product; 1 elastic or scrunchy
- Brush your damp hair thoroughly and work in the curl-enhancing product of your choice (optional, but recommended). Wait until your hair is about 80% dry before the next step if your hair takes a long time to air dry.
- Gather your hair into a low ponytail (for curls focused at the ends) or higher up for cascading curls. Do not secure yet, but hold in place.
- Twist the ponytail in one direction until it forms a tight coil and begins twisting back on itself. Curve the coil around the base of the ponytail to create a spiral shape and secure it with a scrunchy.
- When the hair is fully dry, slowly take the bun down to see your curls! Create a center, off-center, or side part and you’re ready to go.
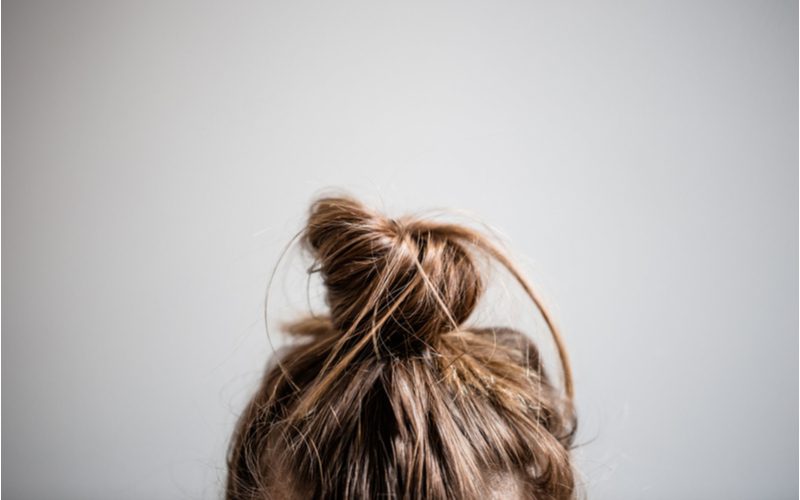
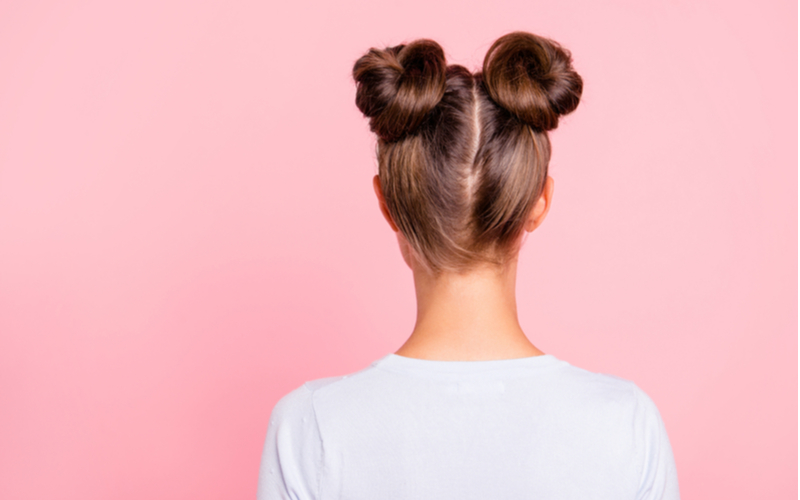
Heatless Mini Bun Curls

Roman Samborskyi/Shutterstock
I just covered coiled bun curls, which are super simple and always deliver nice curls. But my go-to method when I want uniform, lasting curls or waves is doing mini bun curls.
Instead of creating one big coiled bun with all of your hair in it, you’ll be sectioning your hair off and creating a few smaller buns.
With less hair in each bun, they dry a lot faster. This makes mini bun curls the perfect no-heat choice for women with thick, coarse, or low-porosity hair that takes a while to dry.
You can also try this technique with fully dry hair to get looser waves instead of curls. Here’s how you can create heatless mini bun curls:
You’ll Need: Curl-enhancing hair product; rattail comb; 4 hair clips; 4 scrunchies
- Brush your damp hair thoroughly and work in the hair product of your choice – mousse, gel, or curl cream will all help boost your curl staying power.
- Use a rattail comb to cleanly section your hair into 4 quadrants. Do this by creating a middle part, then parting each half into two sections. You can create more sections if you want smaller, tighter curls. Secure each section with a clip for now.
- Unclip the first section and twist it until it coils around. Make it a loose twist for waves or tight twists for tighter curls. Secure with a scrunchy to avoid kinking the ends.
- Repeat for the 3 other sections, securing each with a scrunchy. Allow to dry fully (or leave in dry hair for at least 3 hours). Take down the buns to see your curls!
Overnight 3-Strand Braid Curls
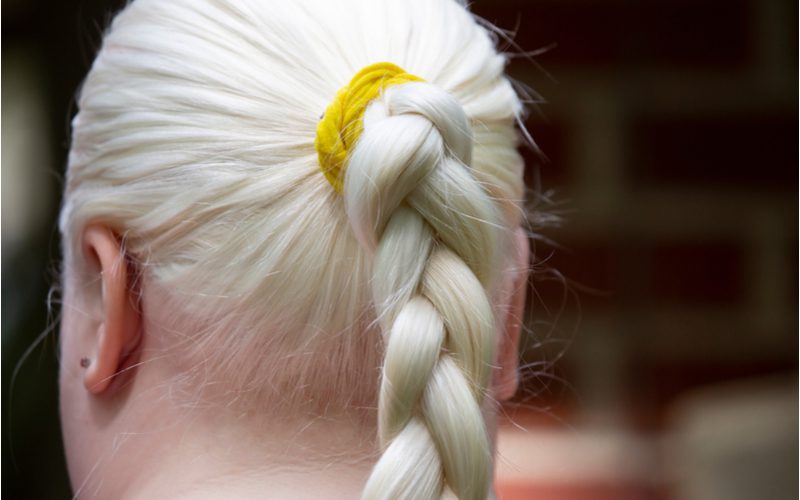

Brandy McKnight/Shutterstock
Overnight braid curls are pretty easy to do and I love the casual, laid-back waves and curls they create. Braid curls won’t curl your ends, so this isn’t a great option for polished or fancy curls.
I get around this by spraying a little water on my ends after taking the braid(s) down to “activate” my naturally wavy texture. This method can be used to create loose waves, loose curls, or tight curls depending on how long you leave them in, how many braids you do, and whether you start with dry or damp hair.
The longer you can leave your braid(s), the more pronounced the waves will be. Here’s how you can create overnight braid curls:
You’ll Need: Curl-enhancing hair product; elastics for each braid
- If you’re starting with damp hair, brush it thoroughly and work the curl-enhancing product of your choice through to the ends. This will help give the ends not included in the braids a little more texture.
- Create a single hanging 3-strand braid down the back for looser waves. Part and section your hair to create multiple braids if you want smaller, tighter curls. Braid as far down to the ends as you can while keeping the braid tight enough to hold.
- Secure the ends with an elastic to hold it overnight or for at least 6 hours. Take the braid(s) down when your hair is fully dry or when the time is up to reveal your waves or curls!
No-Heat Rope Braid Curls
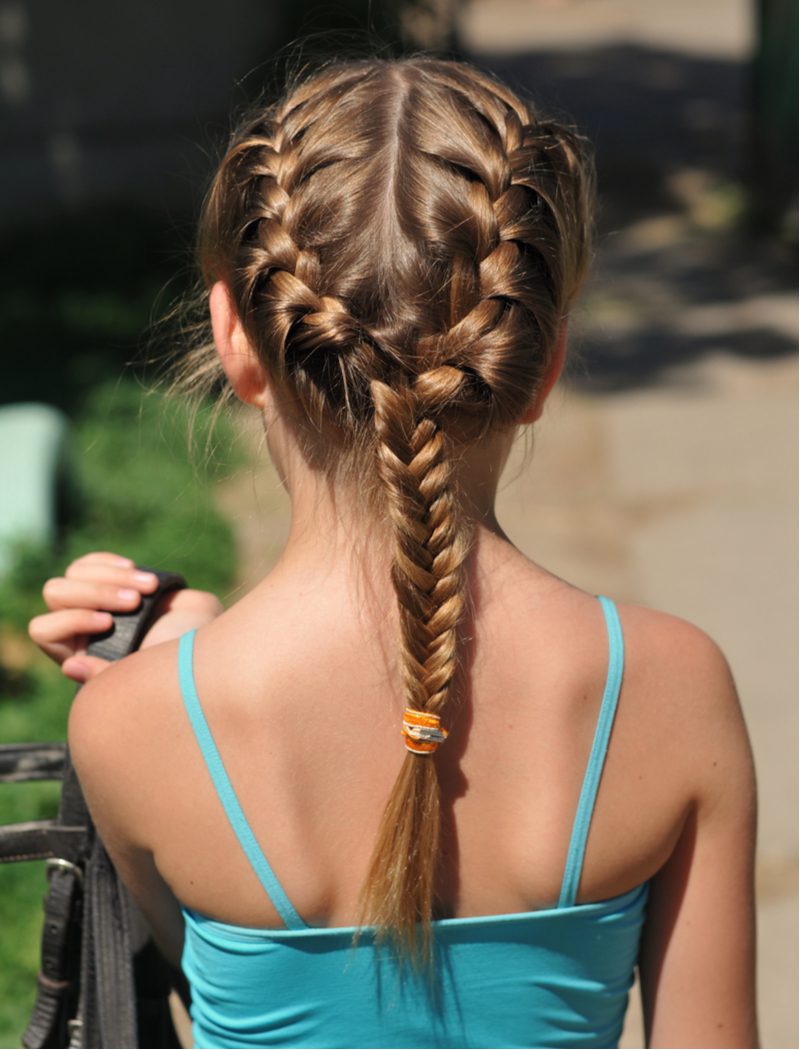

Nataliya Kuznetsova/Shutterstock
While a 3-strand braid will create casual, beachy waves, rope braid curls are more spiral shaped and polished. Rope braid curls are one of my go-to heatless methods when I want pretty waves or loose curls. They always turn out beautifully.
Rope braids are incredibly easy to do. They’re even easier than a 3-strand braid! Once you get the hang of the twisting motion, you can do these with your eyes closed. It’s that simple. Here’s how you can create heatless rope braid curls and waves:
You’ll Need: Curl-enhancing hair product; elastics for each braid; hair clip
- Start with damp hair that has been thoroughly brushed. Work your favorite product through to help encourage more definition and make your curls last longer.
- Create a middle part and secure one side with a hair clip to keep it out of your way for now.
- Split the unclipped section in half and twist both pieces away from your face in the same direction. When you’ve reached the ends, continue holding the twists in place firmly and begin twisting the furthest section around the one closest to your face. This time, you’re twisting in the opposite direction – toward your face instead of away from it. This counterclockwise-clockwise twist will hold the twists in place and prevent them from unraveling.
- Secure the rope braid with an elastic and repeat on the other side. Allow the curls to dry overnight and take both braids down in the morning to reveal your polished, spiral waves!
Heatless Bubble Braid Curls
Have you seen the resurgence of the bubble braid trend? These unique and funky braids can also be used to create the *best* beachy waves that aren’t too structured or polished.
Bubble braid curls aren’t really full-on curls, but this is such a great technique to have in your pocket for a rainy day.
The principle is simple – just like tucking your hair behind your ear creates a gentle bend or wave, using strategically placed elastics in your hair will create similar bends that blend beautifully, look natural, and take very little time to do.
Here’s how you can jump on the trend and get heatless bubble braid waves:
You’ll Need: Several elastics; curl-enhancing hair product
- Work your favorite curl product into your damp hair. Brush it completely to ensure there are no tangles.
- Create a center part and bring each side in front of your shoulders.
- Take a small horizontal section from the top of one side and secure it with an elastic close to your face. Move your hands down an inch or two (or more, depending on how loose you want your waves) before gathering the hair and adding another elastic. You’ve now created a bubble between the first 2 elastics. Tug slightly on the bubble to make it bigger and add more texture.
- Work down the rest of the side, adding elastics and securing all the hair into bubbles. Leave an inch or so out at the ends. Repeat for the other side.
- Allow your hair to dry fully overnight before removing the elastics to see your waves. Spritz your hair with a little water – just a little – to really bring the waves to life!
Twist and Clip Heatless Curls
Twist and clip curls create a loose and casual texture that looks amazing if you have any type of natural wave or curl in your hair. They work best on slightly damp hair that is about 80% dry.
This method is similar to the pin curl method, but you’ll use small clips instead of bobby pins so it’s a little easier to do.
Since clips don’t have as much holding or staying power as bobby pins, I don’t recommend using this method overnight. It’s easy for clips to fall out while you sleep. I like to do twist and clip curls in the daytime while I do my makeup and get dressed.
When I take them down, I have a nice wavy texture with no kinks at the ends. It’s great! Here’s how you can create heatless twist and clip curls or waves:
You’ll Need: Curl-enhancing hair product; rattail comb; 4+ alligator or small hair clips
- Brush through your damp hair and work in the hair product of your choice to enhance the curls or waves you’re creating. Allow your hair to air dry about 80% before the next step if you have time.
- Use a rattail comb to create the part line of your choice and split your hair into at least 4 roughly equal sections. Hold the sections with your alligator clips or small hair clips, leaving one section free to work with.
- Tightly twist the loose section upward and let the twist coil back on itself to create a spiral. Secure the ends of the spiral with a hair clip. Try to position the clip in a way that won’t crimp or kink the ends.
- Repeat for all sections, securing the ends with a hair clip each time. Allow the twists to dry completely before taking them down to reveal spiral waves with no kinks!
Heatless Headband Curls
Headband curls are very similar to the TikTok robe curls, but unlike robe curls, headband curls are a heatless curl technique and cute hairstyle all in one! Just use a cute headband if you plan to wear it as a hairstyle since the front of the band will show.
I absolutely love the curls I get from this method when it turns out properly, but truth be told, I usually struggle with kinks in the ends of my hair. Being especially attentive and careful as you wrap the ends will help you avoid those dreaded kinks!
With headband curls, you’re using a stretchy headband worn around the head like you’d wear a crown. The headband becomes the framework that you’ll use to wrap your hair around.
When I use this technique, I wear it as a hairstyle for the first day and take it down to reveal curls the next day. Can’t beat a two-for-one special on heatless curls! Here’s how to do it:
You’ll Need: Elastic headband; curl-enhancing hair product; bobby pins (optional)
- Start with damp hair that has been prepped with the curl product of your choice. Create a middle part so you’ll have even amounts of hair on each side.
- Put the headband on like a crown so it sits down on the forehead and midway up the back. Bring your hair in front of your shoulders on each side.
- Starting with a small section from the front of one side, hold the section and twist it away from your face a few times before pulling the headband out a bit and tucking the section behind the headband and back to the front.
- Grasping the twisted section you just wrapped around the headband, pick up a little more hair (like you’re French braiding) and twist it away from your face. Tuck the hair behind the headband and grab a little more hair. Repeat until you’ve wrapped all the hair on one side.
- Secure the first side with a few bobby pins for added security.
- Repeat the twist and tuck motions on the other side and secure with bobby pins.
- Allow the hair to fully dry before taking your headband curls down. I like to push the front of the headband up off my forehead and onto my scalp for a cute hairstyle. This enables me to leave the style in longer for more robust curls.
- Remove the bobby pins (if used) and unwrap the hair on each side before removing the headband to reveal your pretty curls!
No-Heat Pin Curls
Pin curls go way back – they’re still a thing because they work so well. This heatless curl option has been a go-to method for women for decades, if not centuries.
I love the versatility of pin curls because you can experiment with different wrapping and pinning techniques to create different types of waves and curls. The simplest pin curl method is quick, creates a loosely structured curl/wave, and delivers kink-free results every time.
As long as you keep your sections relatively small (thick sections won’t curl as well), you’re going to love this method. Here’s how you can get heatless pin curls in a snap:
You’ll Need: 5+ alligator clips; curl-enhancing hair product
- Start with slightly damp hair that has been thoroughly brushed. Work in the curl-enhancing product of your choice to achieve the best, frizz-free pin curls.
- Take a small section from the front and hold it out away from your head. Use 2 fingers like a curling iron barrel and twist the section away from your face and around your fingers to create an open, vertical loop of hair.
- “Roll” the loop down closer to your scalp, ensuring you keep that looped shape intact. Slide an alligator clip inside the loop against your scalp to securely hold the pin curl.
- Repeat for the remaining sections – you’ll want to do at least 5, but make as many small sections as you’d like to create tighter, more structured curls.
- Allow your hair to air dry overnight before removing the clips to reveal your perfect pin curls!
Old School Rag Curls
Oh, you thought pin curls were old school? Let me introduce you to – or remind you of – another vintage method to nail heatless curls every time: Rag curls. Rag curls are done with small scraps of fabric tied into the hair to hold small sections in curled loops.
Women have been rocking rag curls since the 1800s, so you know it’s good if this method is still around and in use. Before you try this heatless method, you’ll need to find an old t-shirt or any type of cotton-y fabric to use as your “rags.”
I cut a t-shirt into little strips about 6 inches long and 2 inches wide. It doesn’t need to be precise – you just want enough fabric to tie up once you’ve rolled your curls up.
If your hair is very thick or dense, you will need to do more than 6 sections to get the best curls from this method. Try 8-10 sections for thicker hair. Here’s how you can do your own heatless rag curls:
You’ll Need: 6+ fabric strips (about 6” x 2”); curl-enhancing hair product; hair clips
- Work your favorite curl product through your damp hair and brush it thoroughly. Section your hair into 6 (or more) pieces by creating a middle part and dividing each side into 3 portions. Hold each section with a small clip for now.
- Unclip the first section and lay a strip of fabric horizontally across it at the ends. Roll the ends of the hair around the fabric, ensuring not to crimp or kink them as you start the roll.
- Roll the hair with the rag poking out the sides all the way up to your scalp. Once you’ve reached the scalp, use your ring finger to hold the curl as you bring the ends of the fabric up and tie them together. Tie a knot to prevent the curl from unraveling.
- Repeat for the remaining sections, rolling and tying the rags into knots when you reach the top.
- Allow your hair to air dry overnight. Untie the knots to remove the rags from your hair. Comb through with your fingers to separate the curls, or brush through for mega-volume.
Things to Consider


Shumskaya Tatiana/Shutterstock
Opting for gentler, no-heat styles more often is becoming the norm for most women. I think a lot of us are realizing that it’s just time to make healthier choices for our hair now that we know better.
Whether it was obvious signs of heat damage, post-Covid hair loss, regular age-related hair changes, or just learning more about your hair’s needs that woke you up, we’re all in the same boat – just trying to make smarter, healthier choices for our manes.
And heatless curls are one of the best ways to be more gentle on your hair without sacrificing style. I’m doing what I can to play catch-up and get my hair’s health back on track.
For me, that meant skipping heat styling whenever possible, choosing lower-heat tools for the rare occasions I heat style (this is why I love the Dyson Supersonic hair dryer), and diligently following a healthier hair care routine with the right products.
And now that you’ve got 10 different ways to create curls and waves sans heat, you’re on the path to healthier, damage-free hair, too!