
Jump to:
Twist outs define your curls, support better hair growth, and don’t require heat to set. If you have natural hair, you need this protective hairstyle in your arsenal. Read on to learn how to master the style.
Considering a Twist Out?
Twist outs are one of the easiest protective hairstyles for natural hair. They allow you to keep your hair securely twisted while you sleep and result in a gorgeous cascade of curls the next day.
Curly and coily hair gets extra definition and bounce with this natural hairstyle. You can leave the twists in for as long as you’d like, and the results last for days.
The best part is that it doesn’t damage your hair one bit. In this guide, we’ll show you everything you need to know about the twist out.
We’ll explain what a twist out is, different types of twist outs, how to do the hairstyle step by step, and a few styling tips to get the perfect twists. Let’s start with the basics: What is a twist out?
What Is a Twist Out?

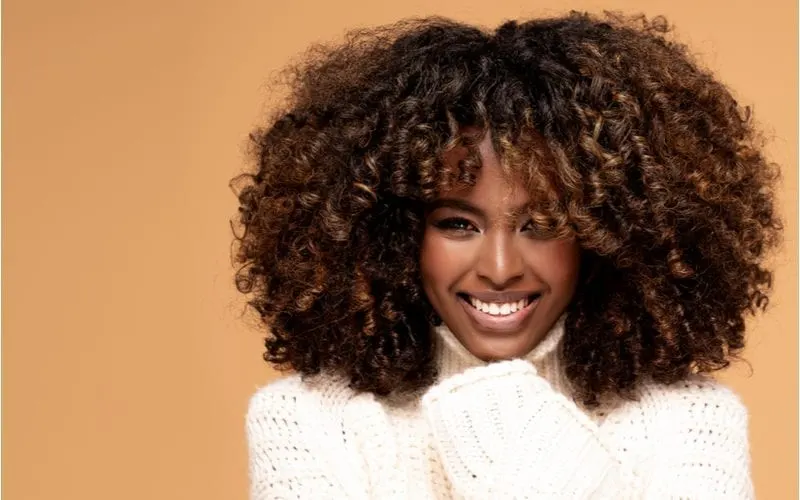
NeonShot/Shutterstock
A twist out is a natural protective hairstyle that involves twisting the hair into coils or rope-like braids while it’s damp, allowing the style to set, and unraveling the next day (or later) for beautiful, defined curls or waves.
Twist outs are like two hairstyles in one:
- You get to enjoy the polished look of twists first
- When you’re ready to unravel them, you get vivacious curls
Protective hairstyles like twists, braids, and dreadlocks are important because they protect your hair from breakage and damage from the elements.
Since afro-textured hair is fragile and prone to breakage, protective hairstyles, like the twist out, can help ensure your hair is stronger, healthier, and faster-growing.
There are a few different types of twist outs that allow you to vary the look of the curls and waves you get the next day. Check out the different types next.
Types of Twist Outs
The type of twist you choose affects the curl or wave pattern you’ll get the next day. Some of the most popular types of twist outs are single-strand twists (also known as finger coils), two-strand twists, and flat twists.
Single-Strand Twists or Finger Coils
Single-strand twists or finger coils are a great choice for shorter natural hair. To do a single-strand twist, you separate the hair into sections and begin twisting each section around your finger at the root until the hair coils. You twist the hair in the direction it usually curls.
You’ll get lots of volume with finger coil twists, but not as much elongation and stretching as flat twists. They don’t take as long to unravel as two-strand twists, so it’s a good choice if you want a quick style in the mornings.
Two-Strand Twists
Two-strand twists are the most common type of twist out. To do two-strand twists, you section the hair and divide each section into two. Starting at the root, you twist the two strands around each other.
Like braids, you can do a two-strand twist on the scalp by picking up additional hair as you twist down the strands (making it a flat twist, which we’ll talk about next).
Or, you can do the twists with only the section you grabbed and let them hang down. Two-strand twists give you less definition at the roots and take longer to separate, but you get lots of volume and more uniform curls in the trade-off.
Flat Twists
Flat twists are another type of twist you can try. Flat twists are done like cornrows with rows instead of square sections. You start by parting your hair into rows, taking a small two-strand section from the top of the row.
After twisting those sections around themselves, you pick up additional hair underneath to add to each twist as you work down the row. This results in two-strand twists that sit flat on the head – hence the name, flat twists.
Flat twists are a little harder to do than single or two-strand twists, but they keep more tension on the hair for more elongation. They usually result in less frizz at the roots and curls that last longer. They also take less time to unravel and separate.
How to Do a Twist Out
Now that we’ve looked at 3 of the most popular types of twist outs, you can learn how to do each one. Here’s how to do a twist out that gives you long-lasting curls.
Prep Your Hair First
The prep for each type of twist out is the same, so before you follow the instructions for the twist of your choice, follow these steps to prep your hair properly. This ensures you get the best foundation for twists that hold.
Start with clean hair that has been moisturized and conditioned well. If you don’t have moisturizing products you love, you’ve got to check out our favorites:
- Maui Moisture Curl Quench + Coconut Oil Curl Defining Shampoo
- Maui Moisture Curl Quench + Coconut Oil Curl Defining Conditioner
- SheaMoisture Intensive Hydration Masque
You may also want to use a detangler to make your hair even easier to work through. Then, go ahead and line up the styling products you’ll be using to help lock those twists in.
The process is much easier when you have everything ready before you start. There’s nothing worse than having to redo a section because you had to go grab something you forgot.
You’re going to need a styling product with hold, like gel or a curl cream. We really love Design Essentials Natural Curl Enhancing Mousse for fine or medium hair, OGX Locking + Coconut Air Dry Cream for medium to coarse hair, and DevaCurl Define and Control Styling Cream for coarse hair.
Any of these products will help add shine, hold the twists in place securely, and cut out frizz for bouncier, more defined curls. Once you’ve got your clean, moisturized hair ready and have chosen your styling product(s), make sure your hair is damp but not wet.
Each type of twist works best when done on damp hair. You can keep a spray bottle filled with water around to spritz hair if it begins to dry while you work.
How to Do Single-Strand Twists
Single-strand twists, finger twists, or finger coils are often the best choice for short natural hair. Keep sections smaller for more defined curls, or grab larger sections for a more wavy pattern.
- Apply a good curl cream or gel to your damp (not wet) hair for extra hold and definition. You can also apply a little gel to your fingers to aid in twisting the hair.
- Starting at the bottom of your hairline, grab a small section of hair at the root and twist it in one direction until it begins to coil in on itself.
- Continue around the entire head, grabbing roughly equal sections and twisting to hold the hair in place.
How to Do Two-Strand Twists
Two-strand twists are such a great foundation hairstyle. Choose two-strand twists if you want lots of volume and the most uniform curls.
- Apply your curl cream or gel throughout your damp hair. Keep it handy so you can dip your fingers in to add a little extra gel to each twist as you work.
- Separate your hair into sections according to the twist size you want.
- Divide your first section into two parts and apply a little more gel to your fingers. Twist the two strands around each other tightly all the way down the strands. Twirl the ends a few more times to help lock the twist in place.
- Continue working around the entire head, twisting each 2-strand section from the roots to the tips.
How to Do Flat Twists
Flat twists are very similar to cornrows and have the benefit of elongating your hair more than finger twists or two-strand twists. They also give you more root definition and help cut down on frizz.
- Apply your gel or curl cream all over your damp hair. Keep it handy so you can dip your fingers in to add more to each section as you work.
- Part your hair from the front to the back and create vertical row sections that are equal in size.
- Starting with the first row, grab a small section of hair at the front of the row and part it into 2 sections. Dip your fingers in your curl cream and twist that section like you would a two-strand twist.
- Pick up additional hair with each section as you move down the row, adding hair to both strands of your two-strand twist as you go. This holds the twist flat to your scalp like a braid and gives better hold, more curl definition, and more elongation.
- Continue until you’ve flat twisted all the rows.
How to Take Twists Out
Once you’ve twisted and set your hair (at least overnight, but you can leave them in longer), it’s time to take them out and reveal your curls. You don’t want to undo all your hard work by taking them down the wrong way! Here’s the best way to remove your twists.
First, grab a moisturizing hair oil like coconut, olive, or argan oil to help you keep frizz at bay while you work through the twists. Get a little oil on your fingers and unravel your twists as follows.
Taking Out Single Strand Twists
Unravel single-strand twists by grasping the end of the twist and twisting in the opposite direction. Then separate the unraveled section into 2 sections and gently twist them back into their curl shape (in the same direction they were twisted).
Taking Out Two-Strand Twists
Starting at the bottom of your hairline, untwist carefully in the opposite direction you twisted in. The result should be voluminous, bouncy curls.
Keeping oil on your fingers is important here. After all, this steps frizz from ruining your new curls. If you want, you can divide each defined curl into smaller sections for a wavy look.
Taking Out Flat Twists
Unwind your flat twists starting at the bottom and working your way up the rows. You’ll find it easier to start with the last row on either side of your head. The result should be voluminous curls with lots of definition from the root to the tip. Keep oil on your fingers as you work to combat frizz.
More Twist Out Tips
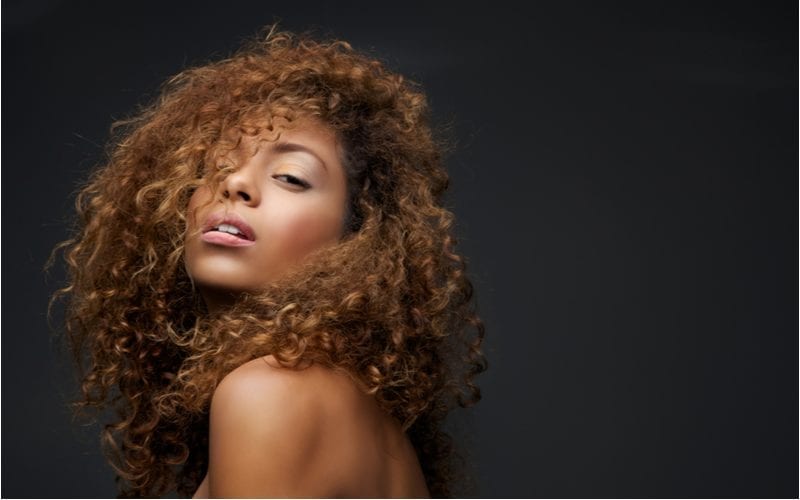

Mimagephotography/Shutterstock
Creating the perfect twist out is easier when you’ve got tried and true tips from natural hair experts. Check out what the pros have to say about getting the best results from your twist out style.
- Ditch the comb for parting. Yene Damtew, Michelle Obama’s stylist, says imperfect parting leads to the best results. She recommends skipping the comb to create perfectly parted sections. Instead, use your fingers to create each section with a little bit of irregularity. It’s easier to blend your curls and get a natural look this way.
- Leave the twists alone. Once you’ve twisted your hair, it’s hands off. Allow your twists ample time to dry and set before you unravel them to get the best curls. Celebrity natural hair stylist Lacy Redway says the longer you leave your twists in place, the more defined and long-lasting your results will be. You can leave them for a week or so to get the longest-lasting curls.
- Use elastics only if necessary. If you have coily hair, you probably won’t need elastics to secure each twist. But if your twists are coming unraveled even with a firm hold gel, Redway says to use small elastics to secure them for better staying power.
- Go smaller for more definition. Smaller twists take more time to do, but stylist Leigh Hardges says they give better results with more defined curls and less frizz. They also tend to dry and set faster than thicker twists.
- Protect the style. Twist outs are meant to be slept in for at least one night before being taken down to reveal the curls. You can cut down on frizz and better protect your hair from damage by sleeping on a satin or silk pillowcase, securing your hair in a silk bonnet or scarf to keep cotton from roughing up your strands and leaching out moisture while you sleep.
The twist out is a simple, pretty way to style natural hair while protecting it from damage. You’ll get next-day curls or waves that are resistant to frizz and stay defined for days.
As long as you properly prep your hair (lots of moisture, ensuring it’s damp and not wet) and use the right products for your hair type (a good curl cream or gel for better hold and curl definition), you can rely on the versatile twist out as a style that works for everyday or special occasions.