Jump to:
Transforming your strands with teasylights is the newest trend in highlights – and the best thing since balayage. Teasylights combine the seamless gradient of balayage with the precision and glowy brightness of foils for perfectly natural, rooty highlights.
Learn about this new highlighting trend, see gorgeous examples, get tips for flawless color, and find out how teasylights are done in this guide!
What Are Teasylights?
- Teasylights involve teasing hair before highlighting for diffused, gradient color
- Create a bright, natural-looking highlight off the root for easy maintenance
- Similar to balayage and foliage highlights with seamless, sweeping color
Teasylights are off-root foil highlights done by teasing hair before applying lightener for smooth, diffused color with no harsh lines.
A stylist teases sections of the hair before applying bleach and developer for flawless, gradient color that looks perfectly blended. This pre-teasing process leaves several thin, unteased strands behind in each section.
The bleach mixture is then applied to those unteased strands with foils to lock in the heat and allow for more lift. The pre-tease technique also helps eliminate any harsh lines in the highlights.
Teasylights vs. Balayage
- Teasylights involve pre-teasing hair before highlighting; balayage doesn’t
- Teasylights use foils for higher (brighter) lift levels; balayage doesn’t
- Teasylights and balayage both create seamless, gradient color
Teasylights are similar to balayage highlights because they both create smooth, gradient color without harsh lines. But there are some key differences to keep in mind.
While balayage involves hand-painting bleach and developer onto hair for a natural-looking, lightened result, teasylights use foils that allow for brighter highlights with more lift.
This is due to the foils’ ability to lock in heat and moisture – both maximize the brightening potential of your highlights. Teasylights also involve pre-teasing hair before applying lightener, while balayage highlights don’t involve this step.
Teasylights vs. Foiliage
- Teasylights always involve pre-teasing hair before applying lightener
- Foiliage can involve pre-teasing, but doesn’t always
- Both create a natural-looking, seamless color gradient
Teasylights and foiliage are very similar highlighting techniques for creating a smooth, sweeping color gradient with no harsh lines. They both make use of foils to separate the lightened sections from the rest of the hair, which allow for brighter color with more lift ability.
The main difference is that teasylights always involve pre-teasing the hair before applying lightener, while foiliage doesn’t have to involve this step.
Some stylists will tease the hair with foiliage techniques, but many simply weave out sections and hand-paint the color in a gradient pattern before enclosing them in foil to lift.
Teasylights vs. Babylights
- Teasylights involve pre-teasing hair before highlighting; babylights don’t
- Babylights create ultra-thin, subtle highlights; teasylights create flawless, gradient color like balayage
- Teasylights and babylights both use foils when applying lightener
Teasylights and babylights are also similar highlighting techniques with a few important differences. Both use foils for more color application control and higher levels of lift, and both are used to create a more natural-looking highlight that’s far from chunky or bold streaks.
But teasylights involve pre-teasing the hair before applying lightener and enclosing with foils to lift. Babylights involve weaving out ultra-fine strands of hair before applying lightener and enclosing with foils to lift.
Teasylights are used to create off-root, seamless balayage-like color, while babylights are used to add subtle, fine highlights throughout the hair.
How Teasylights Are Done: The Process
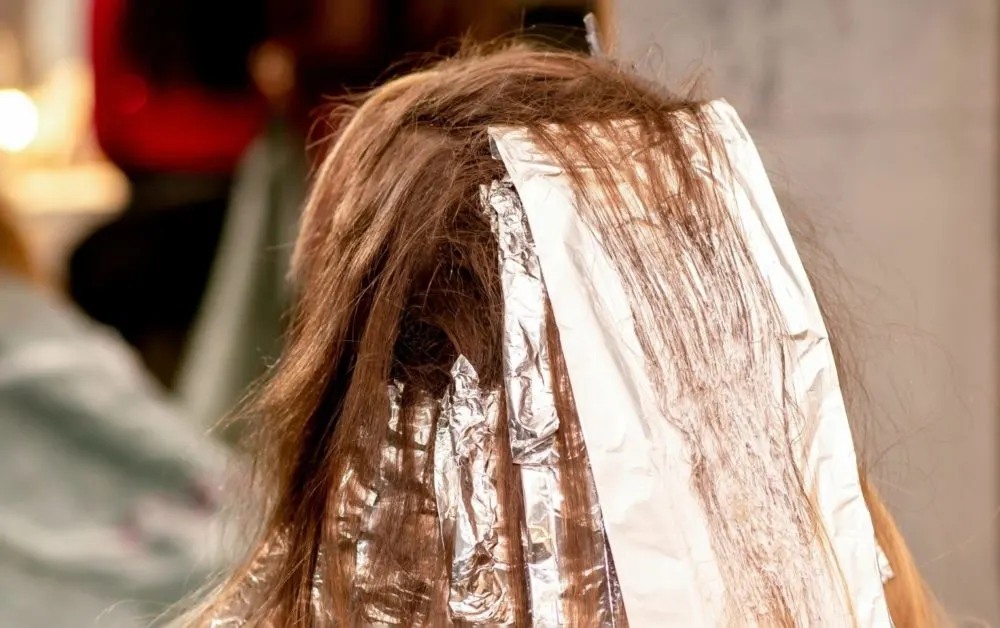
Michelle Aleksa/Shutterstock
When you get teasylights, sections of your hair will be woven into finer strands with a rat tail comb against a foil, then teased (backcombed) before the lightener (bleach + developer) mixture is applied.
The way your stylist does your teasylights will depend on the look you’re going for. Different highlight weave widths alter the final result. A finer, tighter wave creates subtle, all-over color that is ultra-blended and diffused.
A medium-sized weave creates soft, blended highlights that are less diffused for more concentrated color. A thicker weave creates higher-contrast pops of color that are somewhat blended, but ensure the highlight color doesn’t “get lost” in the base.
For Ultra-Blended, Subtle Highlights
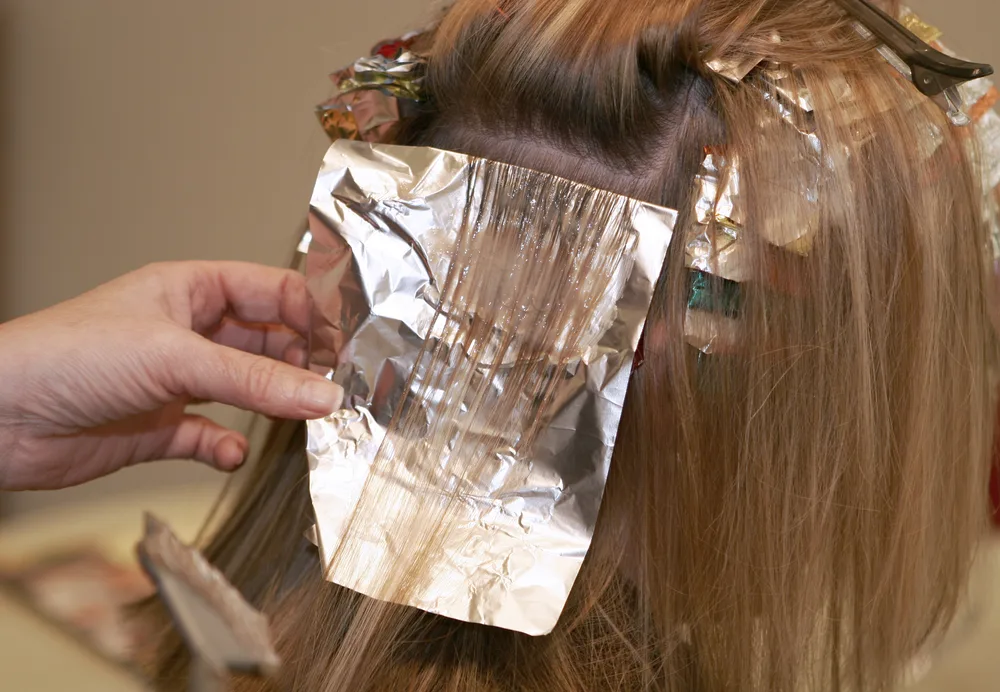
Lorraine Kourafas/Shutterstock
If you want ultra-blended, subtle teasylights that don’t totally melt into your base color for the most natural look, a different weaving technique is used. Your stylist will take small sections of hair and use an ultra-fine weave to leave tiny strands with very little space between them.
This makes your hair have an evenly diffused color. Once the hair is woven on the foil, your stylist will tease the hair by backcombing toward the root and apply lightener from the midshaft to the ends.
For Soft, Blended Highlights
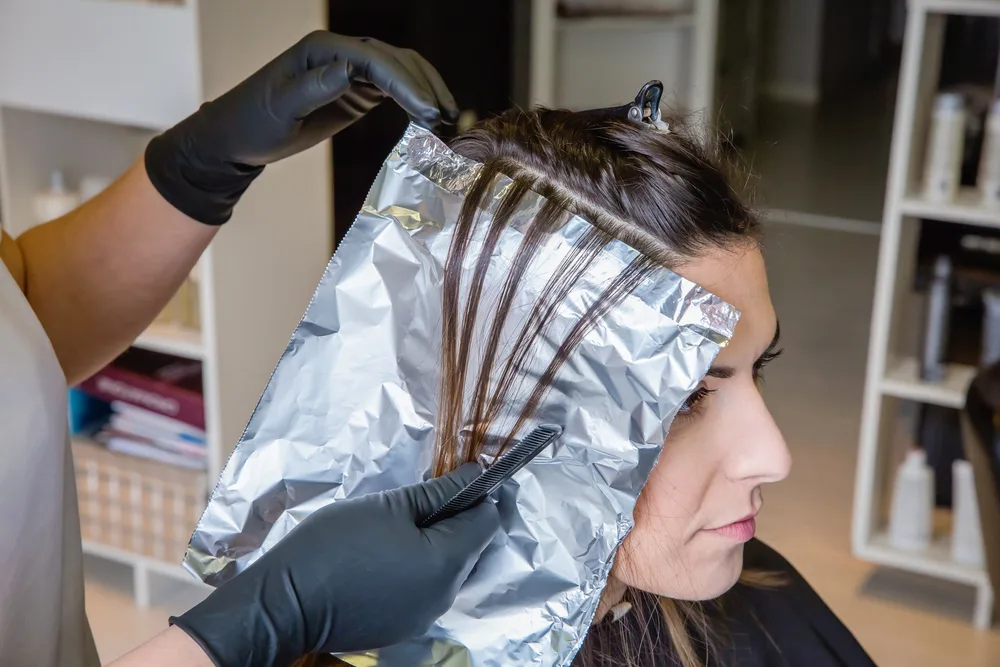
David Pereiras/Shutterstock
If you want smooth, diffused color melting all the way around, your stylist will use a medium-sized weave. This type of highlight weave leaves roughly even-sized sections of hair with equal amounts of space left between them before teasing the hair on the foil and applying lightener from the midshaft to the ends.
For Bolder Pops of Color
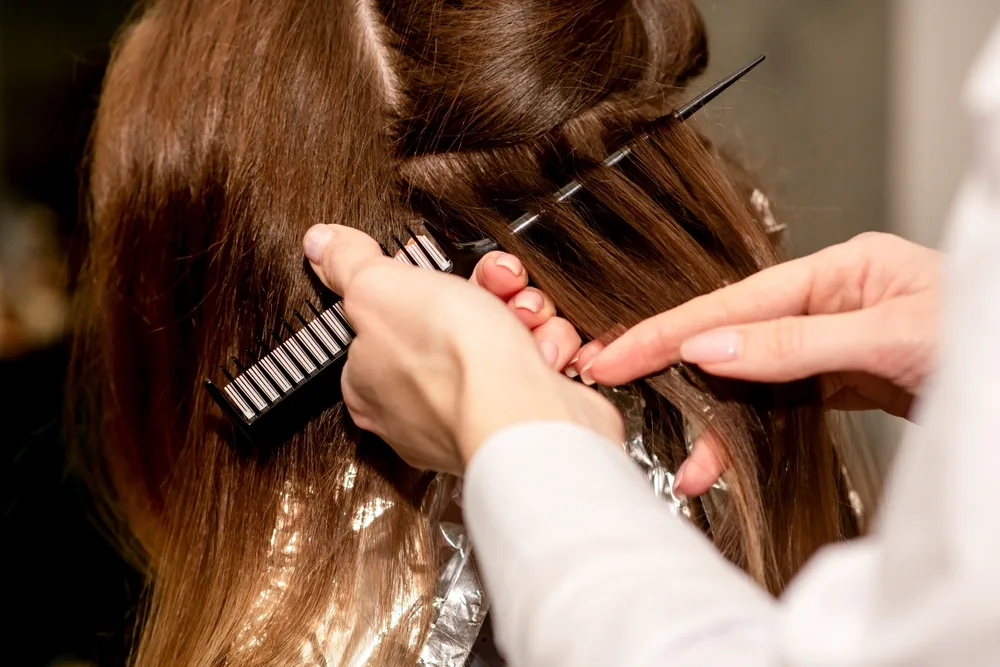
Michelle Aleksa/Shutterstock
If you want to ensure your teasylight color isn’t lost in the base color or diffused out too much, your stylist can use a thicker highlight weave to create bold pops of color. A thicker weave leaves more strands in each woven section and a little more space between the woven sections.
After weaving the strands, the hair is teased at the root and lightener is applied from the midshaft to the ends. Since the hair is still teased near the roots to help blend the color seamlessly, the results won’t look “chunky” or stark in contrast like 90s streaks.
You Might Also Like:
- What Color Should I Dye My Hair? Quiz
- The Peekaboo Highlight Trend, Explained
- How Soon Can I Dye My Hair to Fix It?
10 Gorgeous Teasylight Examples and Inspiration
Now that you’ve explored what teasylights are, how they’re different from other highlighting techniques, and the general process of getting them done, it’s time for the fun part: Checking out some gorgeous examples and inspo!
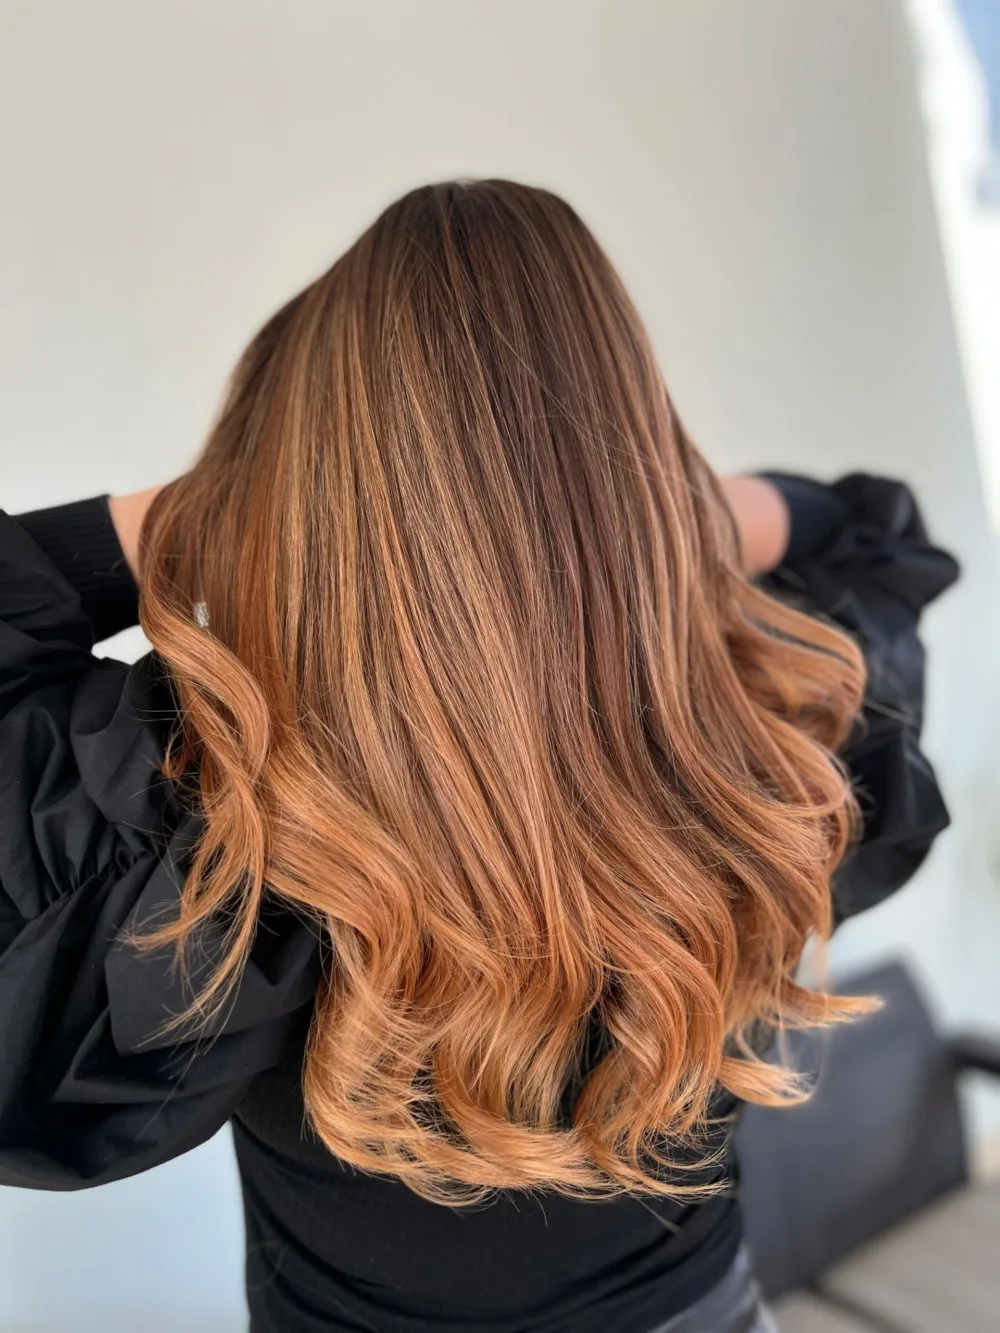
1. Auburn Base With Bright Copper Teasylights
Adelina Elena Bujor/Shutterstock
A deep, sultry auburn base color is perfectly complementary to a bright copper teasylight tone with golden, red undertones. This example creates soft, blended color with a medium-sized highlight weave for plenty of color payoff that melts into the auburn base.
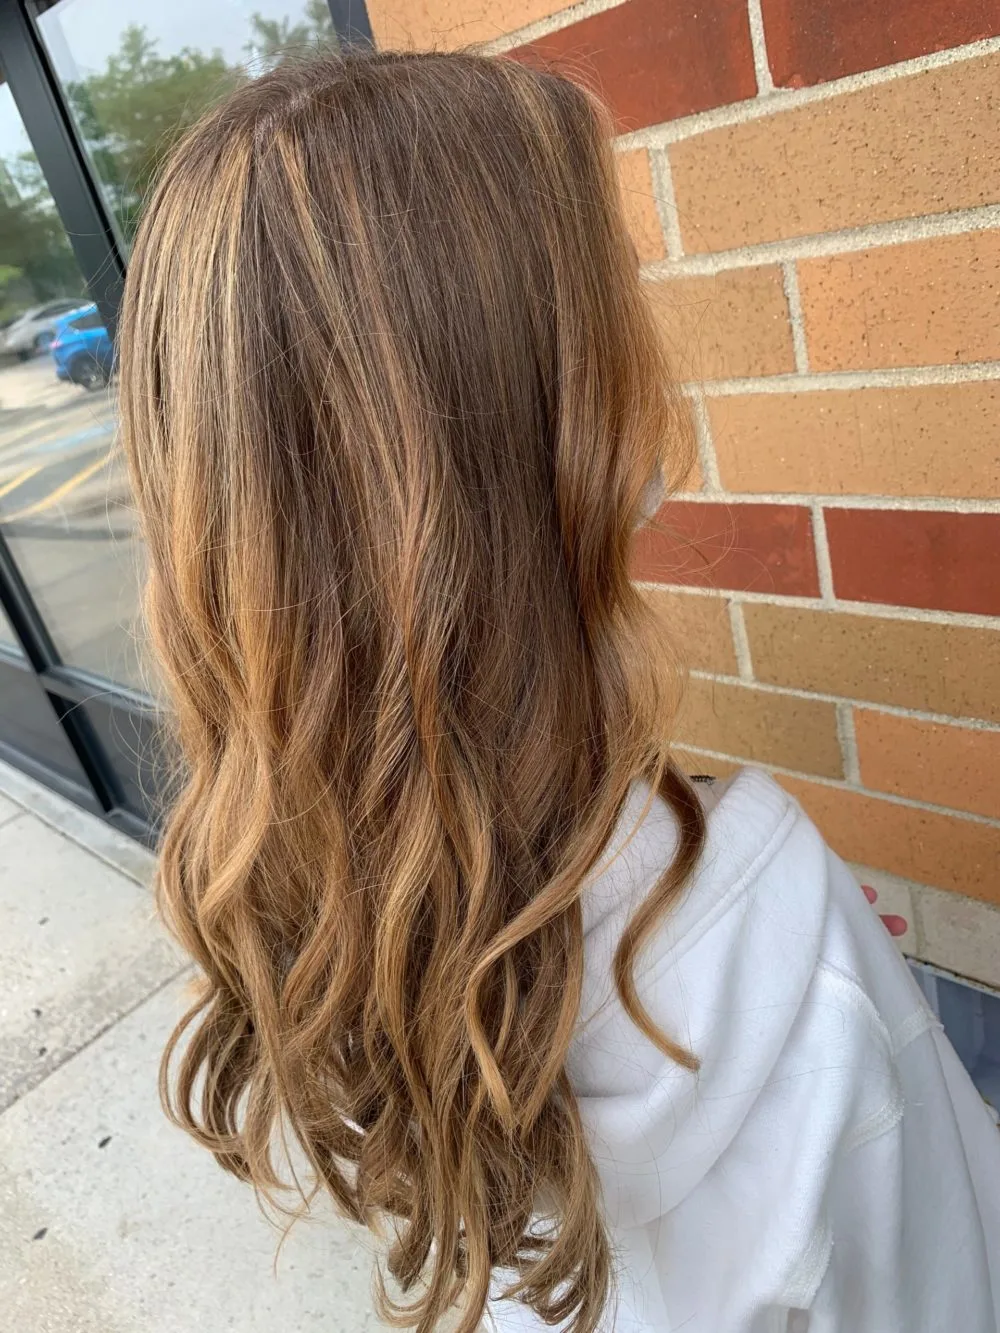
2. Warm Brown With Subtle Golden Blonde Teasylights
Hannah Soukup/Shutterstock
A warm brown base features golden undertones that golden blonde teasylights pick up really well. Keeping the highlights diffused and soft makes the look more subtle and natural. Using a fine highlight weave is the key to nailing subtle golden color like this!
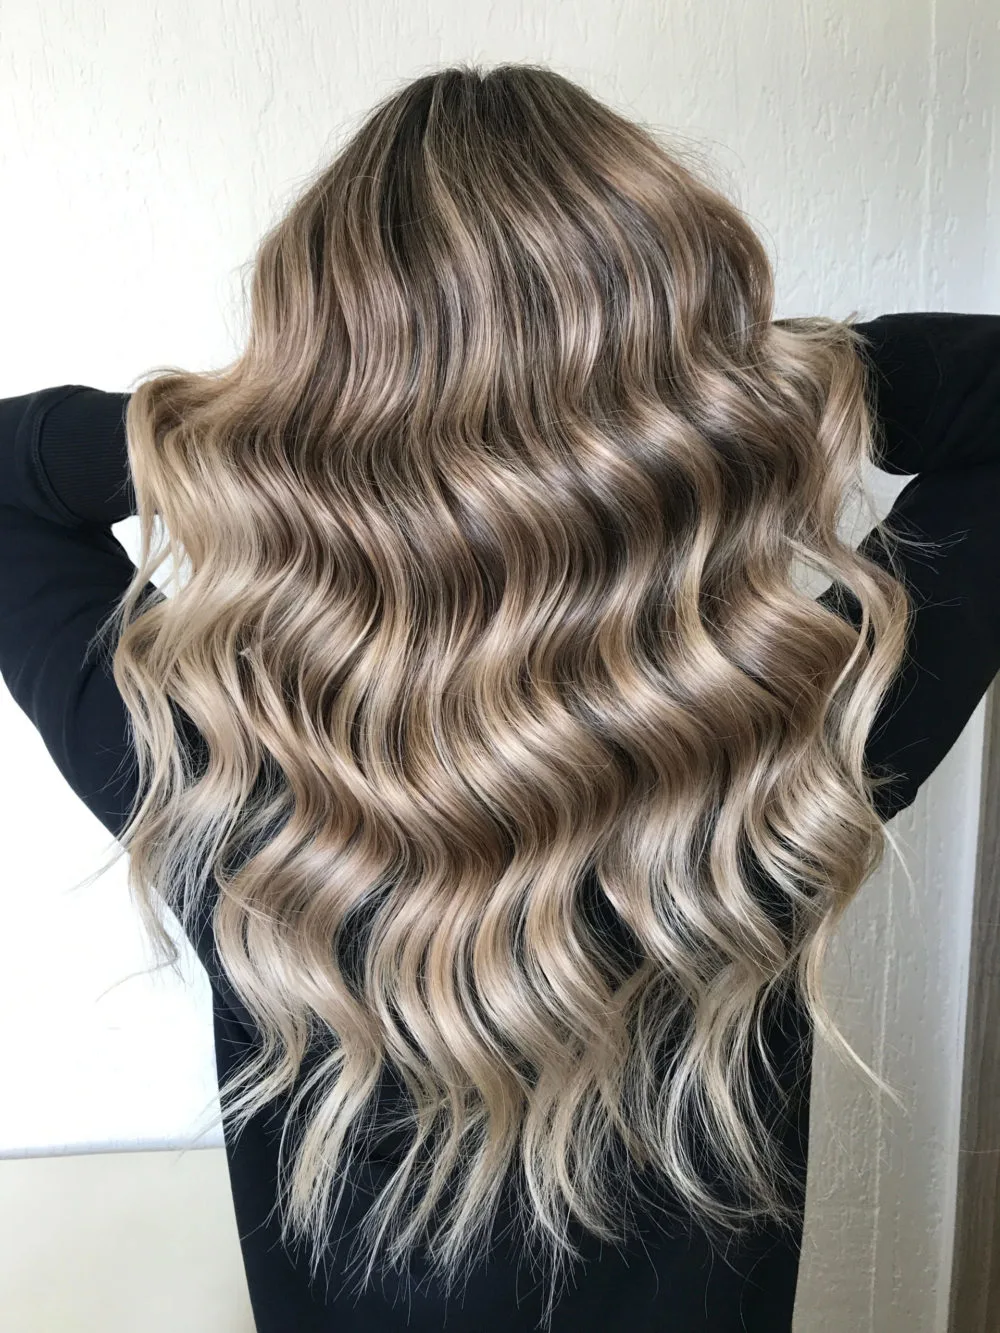
3. Deep Ash Brown Base With Ash Blonde Teasylights
Shumskaya Tatiana/Shutterstock
Silvery, cool ash brown and blonde tones are a match made in heaven for a blended teasylight look! Bold pops of ash blonde color are woven into the deep brown base with a thicker highlight weave to ensure the blonde tones don’t get lost or overly diffused in the base. Teasing the highlighted sections ensures well-blended, seamless gradient color.
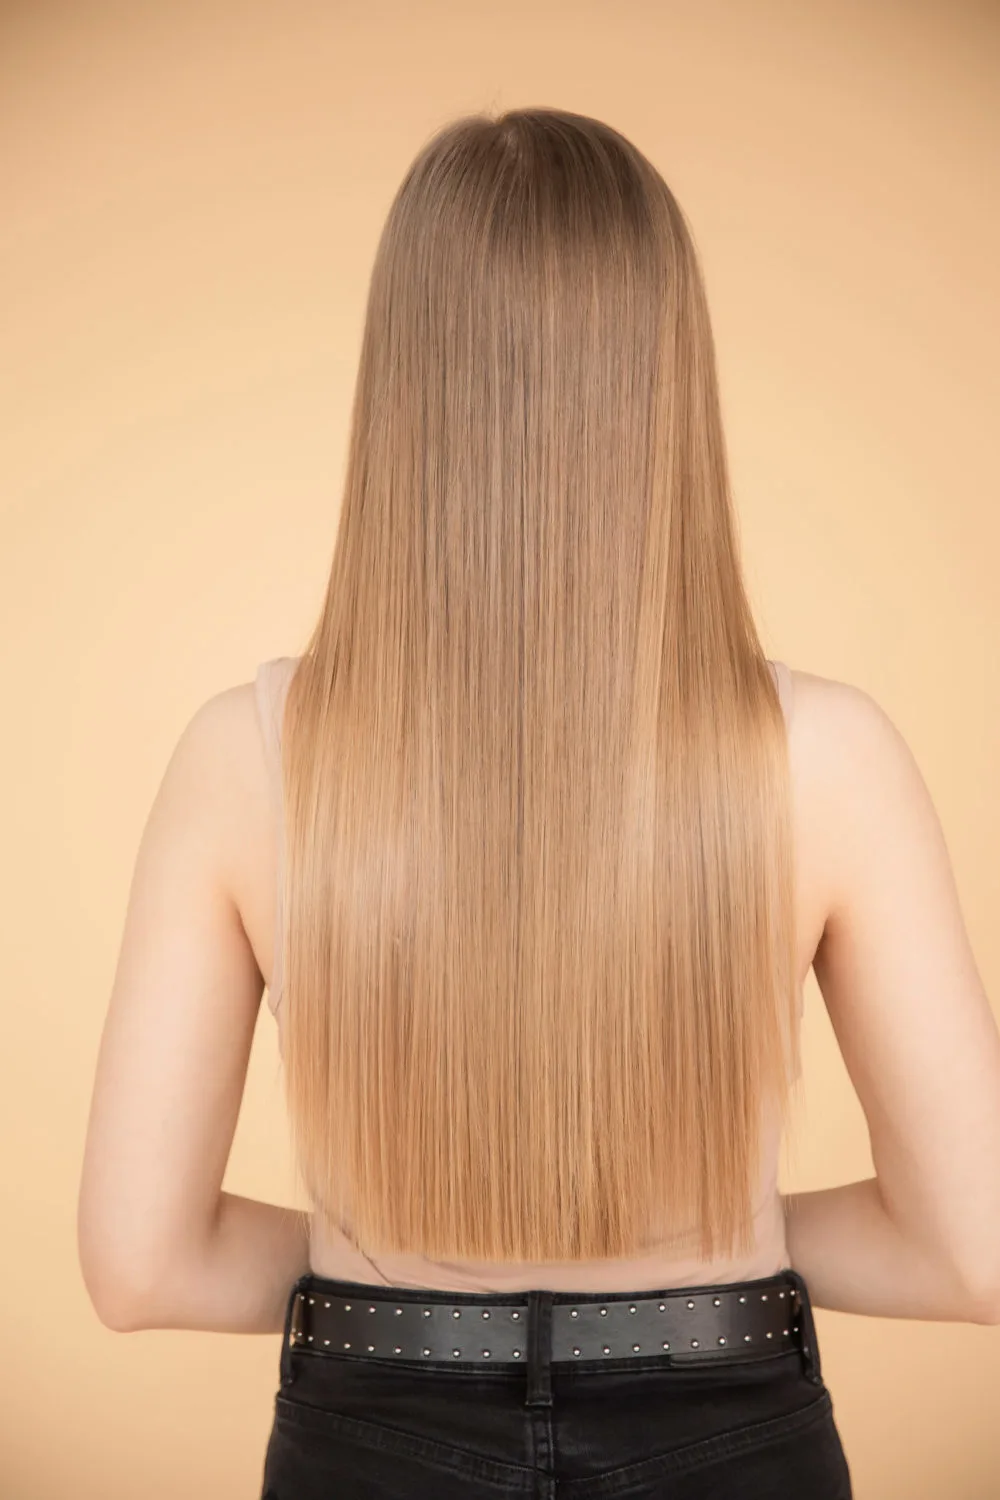
4. Pale Golden Blonde Teasylights With Dark Blonde Base
Parilov/Shutterstock
Stunning pale golden color diffuses effortlessly and smoothly into the dark blonde base color in this example. It’s a unique color combo that is a little lower-maintenance than bright or heavily-toned blondes. The straight texture here really shows off how well-blended and diffused these baby-fine teasylights are!
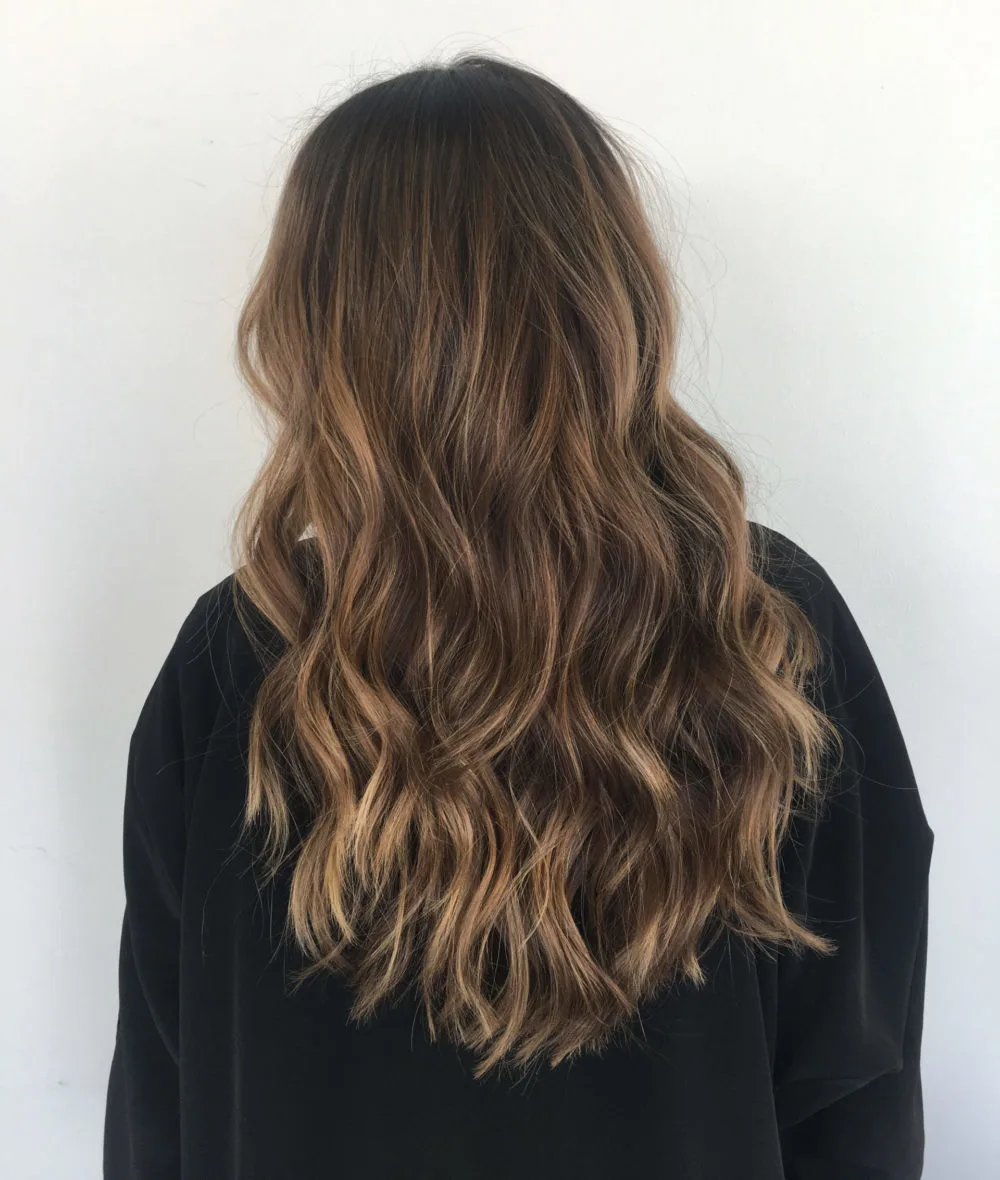
5. Milk Chocolate Base With Golden Blonde Teasylights
Sare Hansen/Shutterstock
A warm, chocolatey brunette base color is the perfect foundation for shimmery, golden highlights. The pre-teasing step ensures the highlight color is evenly blended, while using a medium to large highlight weave leaves a few contrasting pops of color for extra blonde accents.
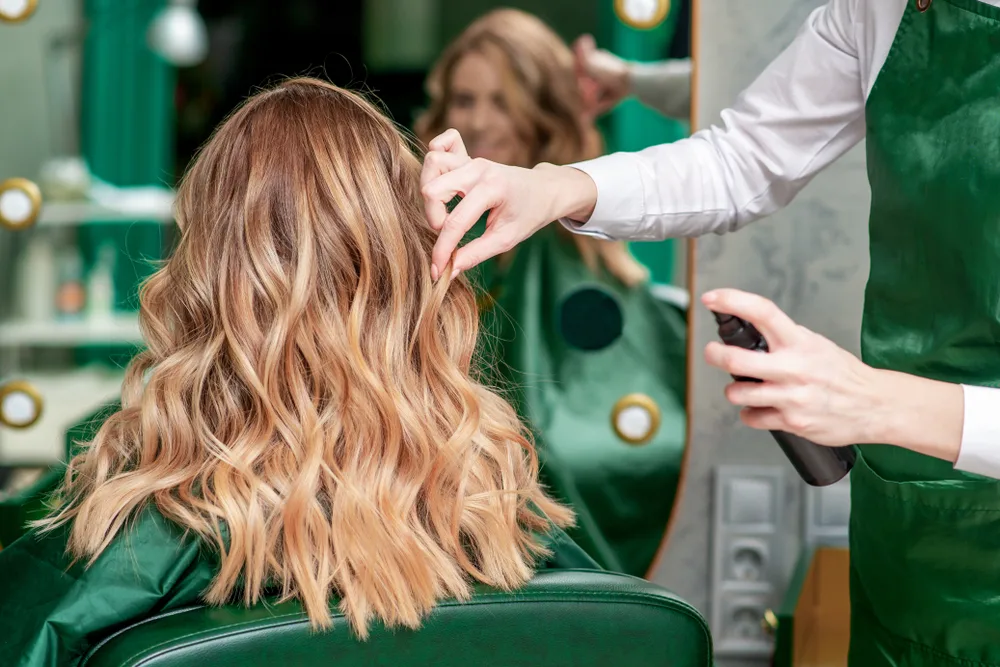
6. Light Chestnut Brown With Strawberry Blonde Teasylights
Michelle Aleksa/Shutterstock
Hints of gold and auburn light up a chestnut brown base with lots of warmth and dimension. It’s an ideal base color for a bright strawberry blonde teasylight with golden-red undertones.
This example uses a larger highlight weave for bold pops of strawberry blonde color that contrast nicely with the toasty light chestnut base.
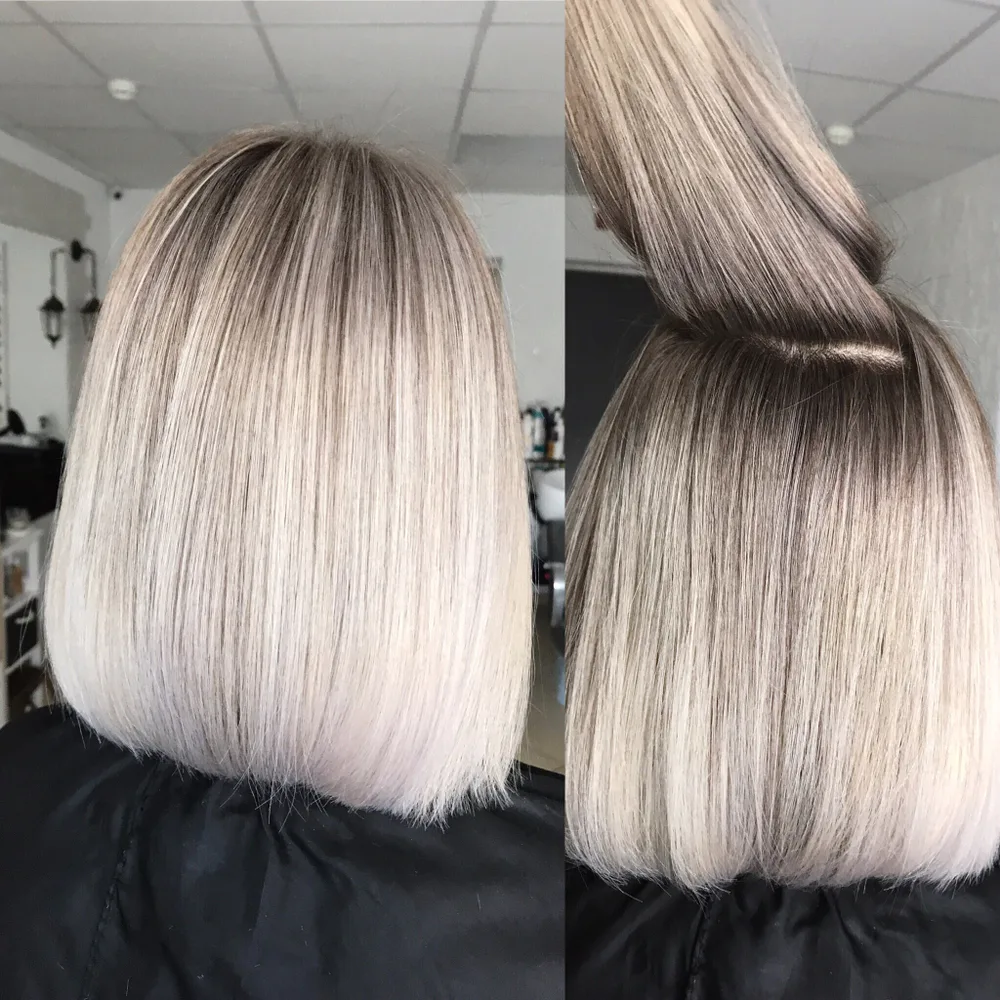
7. Blended Silvery Platinum Teasylights
Shumskaya Tatiana/Shutterstock
Bright, silvery platinum blonde melts flawlessly into a medium ash brown base with a smooth color gradient. The hair on top is highlighted closer to the root for all-over brightness, but the layers underneath feature a root melt effect that is easily achieved with teasing before lightening.
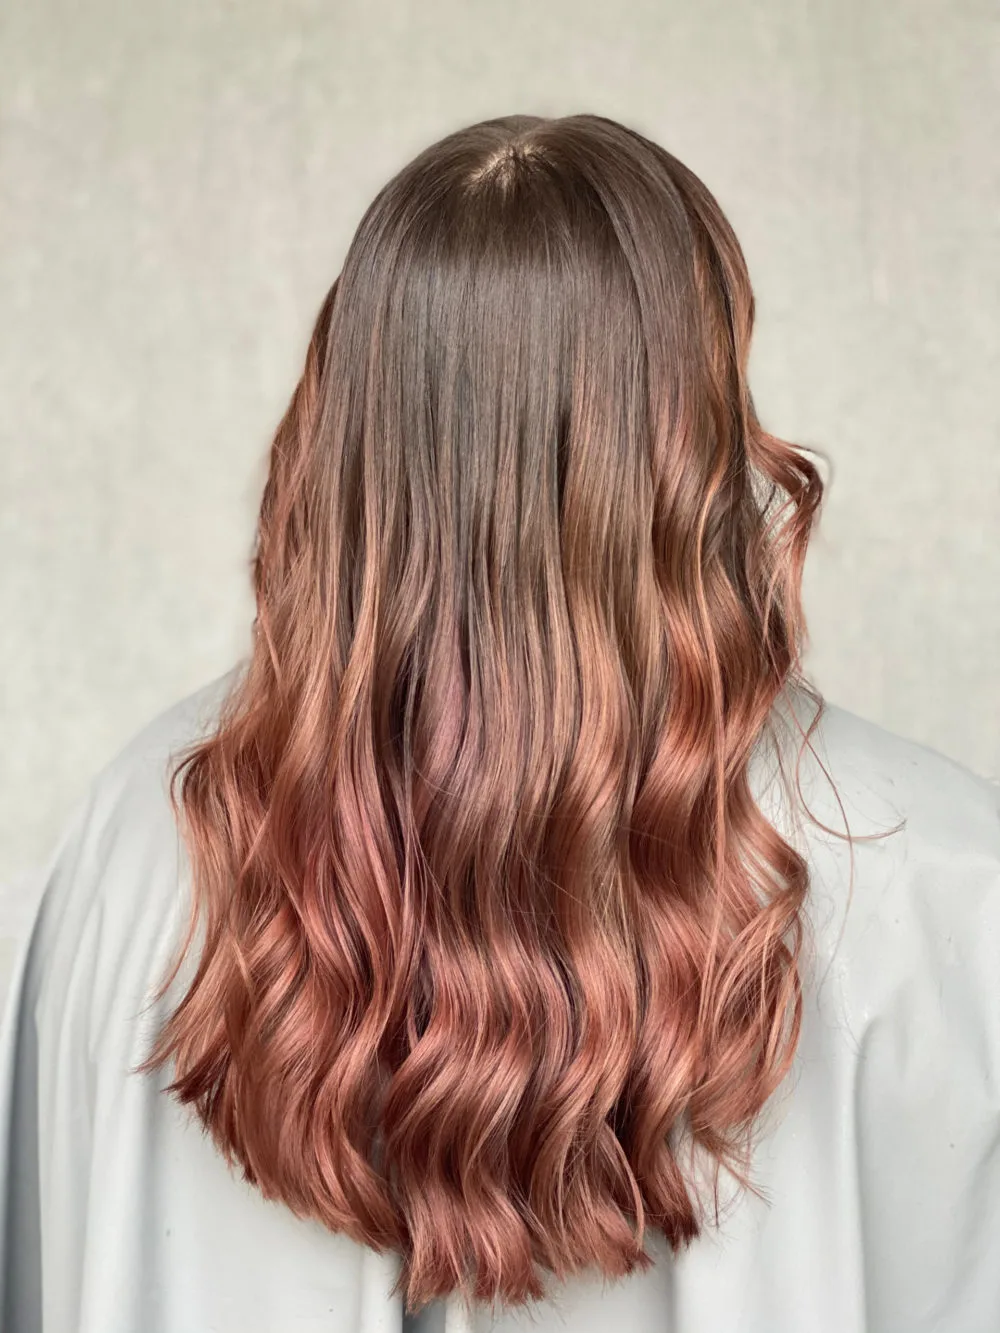
8. Brown Base With Soft Rose Gold Teasylights
Ann Narmaniya/Shutterstock
Rose gold color is a gorgeous option for bright teasylights that pair well with brown, red, or dark blonde base colors. The pinkish gold undertones in the highlight color pick up the shimmering warmth from the brown base in this example. A medium-sized highlight weave ensures soft, blended color that isn’t too diffused for lots of contrast.
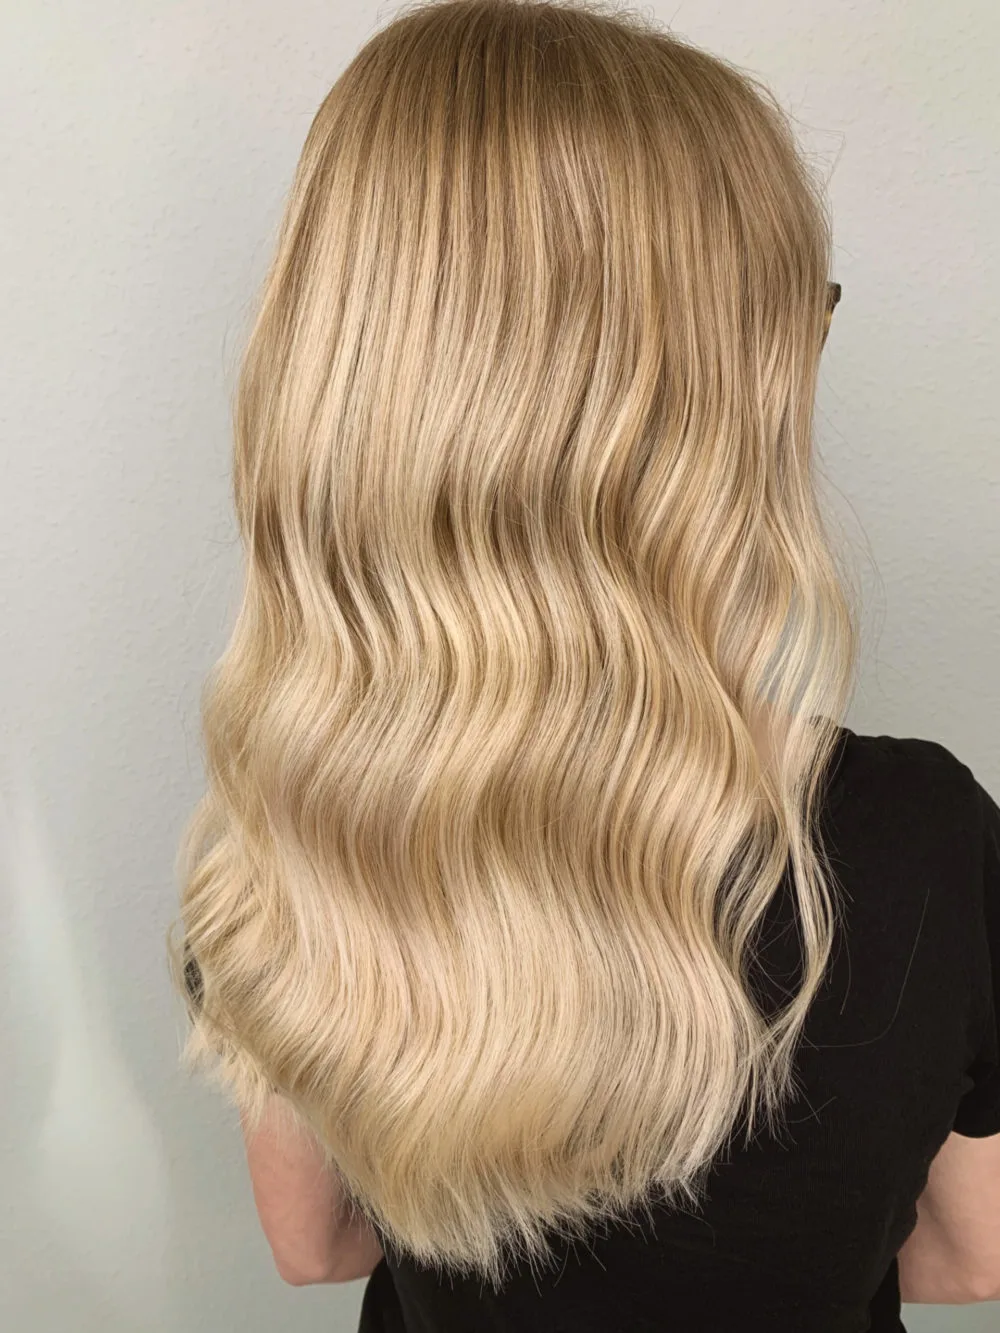
9. Golden Blonde Base With Butter Blonde Teasylights
Sophie Hartmann/Shutterstock
Golden blonde and buttery blonde have similar golden undertones, so they work well together for a perfectly diffused teasylight look. Ultra-fine strands are woven for a well-blended look with a smooth gradient that looks natural in this example.
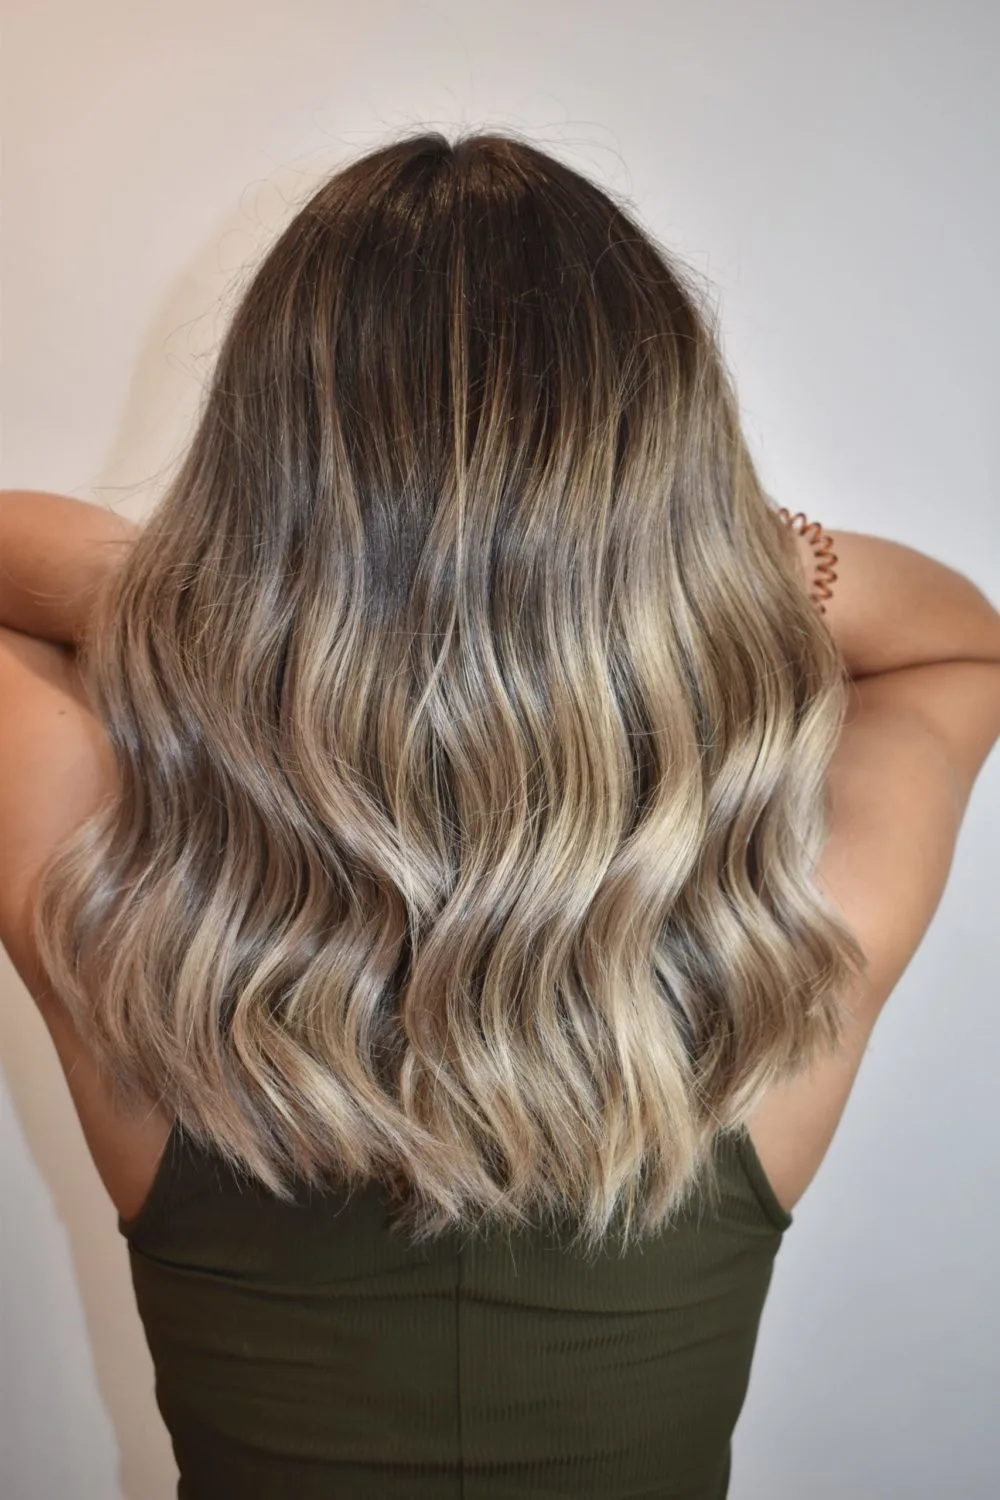
10. Warm Brunette to Champagne Blonde Teasylight Root Melt
Leibarssalon/Shutterstock
Teasing sections with an ultra-fine highlight weave creates super-diffused, well blended color that seamlessly transitions from a darker brunette shade at the roots. Pairing a warm brunette base color with a cooler champagne blonde is a great color combo for neutral undertones.
Things to Consider
If you’re thinking about getting teasylights to add a little natural-looking brightness without harsh lines or stark streaks, we’ve got some tips for you. Keep these things in mind to make sure you get the look you’re after!
- Assess your hair’s health first. Any kind of chemical process – bleach, color, perm, etc.- has the potential to damage your hair. It’s important to assess your hair’s current condition before you consider getting teasylights to avoid causing irreparable damage. If you’re seeing lots of breakage, split ends, a dry or straw-like texture, a melted or gummy texture, or any other obvious signs of damage, you shouldn’t highlight your hair right now.
- Know how subtle or bold you want to go. You can go for a super-diffused, subtle teasylight or opt for something a little bolder. It all depends on how your stylist weaves your hair before highlighting. Smaller, tighter weaves create diffused color while larger weaves create more noticeable highlights and pops of color. If you want the most natural-looking color, you might ask your stylist to weave baby-fine teasylights with a few larger pieces for contrast.
- Choose flattering colors for your complexion. Your color choice should focus on shades with undertones that match your skin’s undertones. If you have warm undertones, look for shades with golden, red, or yellow undertones. Cool undertones should seek out shades with cool silver, violet, blue, or ash undertones. Neutral undertones can choose warm, cool, or warm/cool color combos.
- Keep maintenance in mind. Teasylights are great for achieving a brighter overall look without the high maintenance of bleaching your hair from root to tip. But you’ll still need to keep tabs on your hair with regular salon visits for toning and touch ups. As your highlights grow out over a 3-month period or so, you’ll want to get them touched up so they look lived-in, not grown-out.
- Take care of your color and tone. Using a sulfate-free shampoo for colored hair is a great first step to take in keeping your new highlights bright and pure. Using a purple toning shampoo once or twice a week is another way to keep blonde teasylights looking great. Avoiding heat styling without heat protection, staying out of the sun, and washing less often are other good ways to maintain your highlights and keep them from looking brassy.
Transform Your Strands With Blended Teasylights
We’ve covered a lot of ground in this guide – you’re pretty much an expert on teasylights at this point! Think this trendy highlight technique is going to work well for you?
There are tons of benefits to choosing teasylights over a more traditional foil highlight or hand-painted balayage technique. First, teasylights create the most seamless, blended color of all the different highlight techniques.
This technique ensures you won’t end up with harsh lines, blotches of color, or clearly outlined streaks. Instead, you get smooth, gradient color that looks more natural but can be as bold and bright as you’d like.
Teasylights also allow for brighter, higher-lifted levels of blonde because they use foils instead of hand-painted color like balayage. Foils hold in heat and speed up the lift process. They also prevent the lightener mixture from drying out prematurely – when it dries, it stops lifting.
This highlighting technique makes it easy to get baby-fine, ultra-diffused highlights all-over, softly diffused color that melts into the base shade, or a blend of these with bold pops of color mixed in for contrast.
There’s so much variety to how your teasylights can look! As long as you work with a skilled stylist and have your inspiration photos on hand to show them, you’re going to love how teasylights totally transform your hair.
Who knew that gorgeous, natural-looking color with brightness could be accomplished with a little backcombing and bleach? So what are you waiting for – head to the salon and change up your look today!
