
Jump to:
Looking for unique hairstyle patterns? You’re in the right place. Our complete guide below covers the best styles, how to get them, and gives you a few things to consider before going to your barber or experimenting with clipper designs at home. Read on to learn more.
Looking for Hairstyle Patterns?
Hairstyle patterns and designs are trending for men right now. Try your hand at shaving designs at home with the help of clippers, a straight razor, and our guide! Learn step-by-step how to shave simple patterns into your hair to take your fade or undercut to the next level.

Dmytro Kolesnikov/Shutterstock
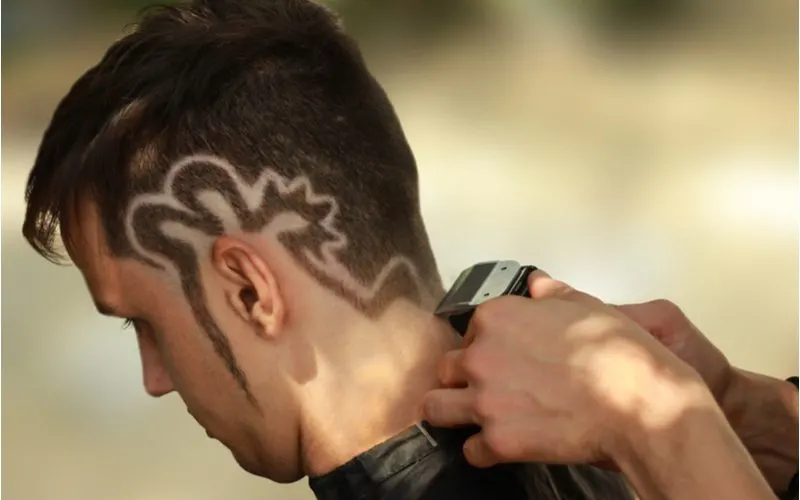
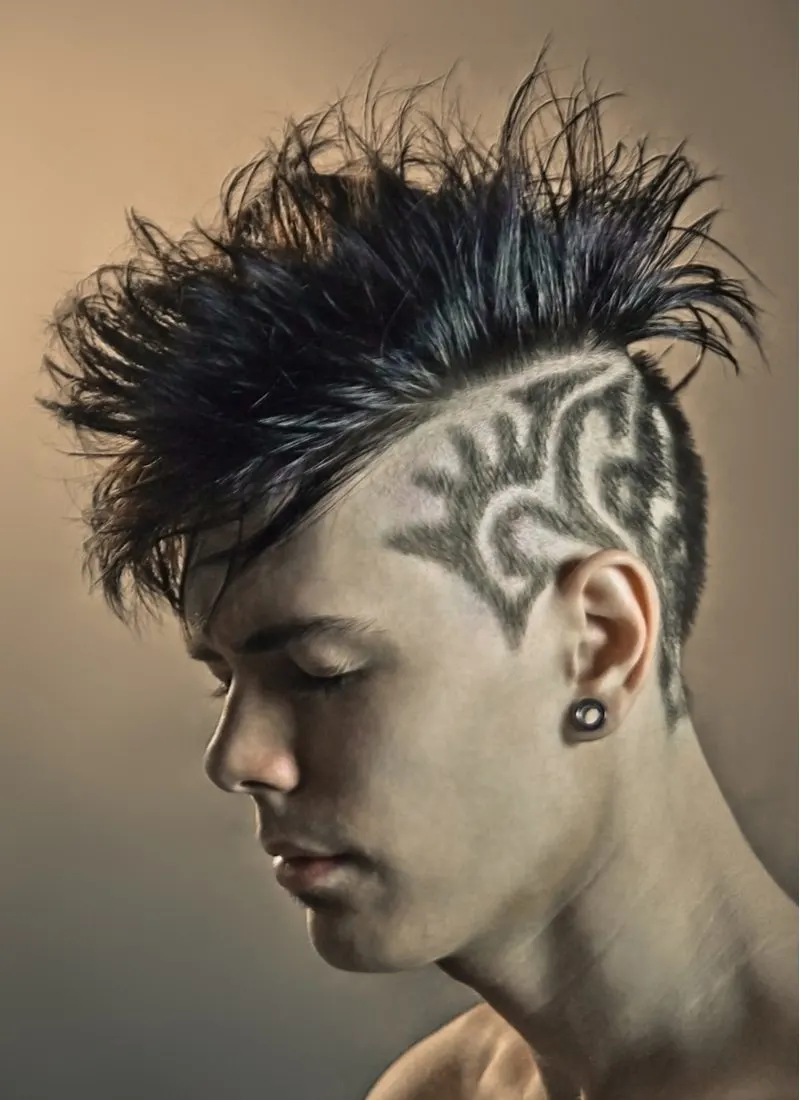
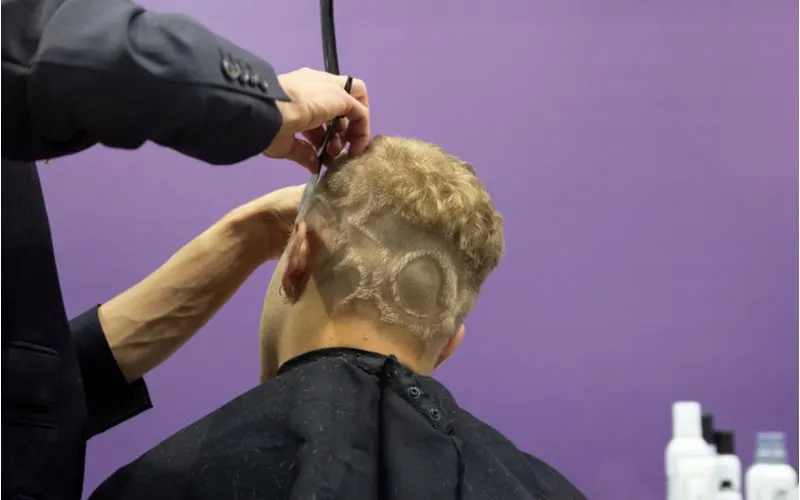
The most popular men’s hairstyles were pretty basic in the past. But today, skilled barbers are bringing artistry and design back into the mix with unique shaved hairstyle patterns and designs.
Sometimes called hair tattoos, these standout designs give you a way to wear your individuality, showcase your personality, and switch things up when you’re ready for something different. Plus – and this can’t be overstated – they look really cool.
Hairstyle patterns and designs turn a classic fade into something trendier. They can morph a stark undercut into a work of art. And they add an appealing edge to any short haircut. If you want a hairstyle that is sure to impress, shaved hairstyle patterns are the way to go.

Dmytro Kolesnikov/Shutterstock
Dmytro Kolesnikov/Shutterstock

Dmytro Kolesnikov/Shutterstock
If you’re willing to try it out yourself at home, this guide is going to take you through the process step-by-step. From choosing your clippers and straight razor to shaving the designs, we’ve got you covered.
In this guide, you’ll find out:
- How to choose the right equipment to shave hairstyle patterns
- What you’ll need to DIY your own shaved designs
- Step-by-step directions to shave designs into your haircut
- Tips and tricks to make the process easier for DIY
- Things to consider before shaving your own designs
Let’s start with your clipper and razor selection, which is so important and sets the tone for how your finished look is going to turn out.
Choose the Right Clippers and Straight Razor
Your at-home haircut is only as good as the clippers and razor you use – true story! Before you begin, make sure you’ll be working with the highest quality equipment you can afford. It will make a big difference in the finished results.
Professional-quality clippers have sharper blades, are ergonomically designed for comfort during use, and are built with durable components that last. The top at-home clippers we found are the Wahl Clipper Elite Pro Home Haircut & Grooming Kit for Men.
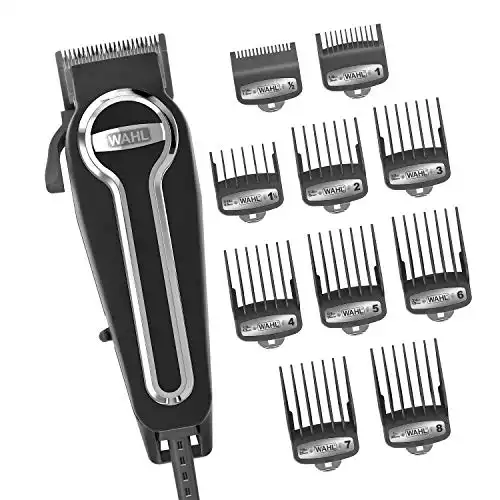
There’s no cordless option available for the Wahl Elite Pro clippers, but it got the top scores among all at-home clippers on our list. It comes with a 5-year warranty on the self-sharpening blades, stainless steel clipper guard attachments, and a handy carrying case.
Plus, it’s a great value. You can see more of our top at-home clipper recommendations here: Best Hair Clippers: Our Top 7 Picks for All Hair Types.
The next important piece of equipment you’ll need to properly shave hairstyle patterns is a good straight razor. Our team came to the consensus that the Equinox Professional Straight Edge Razor is the #1 choice in terms of quality, value, and shave closeness.
It’s made of oxidized stainless steel (no rust) and comes with a pack of 100 disposable razor blades for convenience. This razor is extremely ergonomic and easy to hold in the proper angle. For beginners and experts alike, this is the straight razor we’d recommend.
If you’re not quite so picky and want a straight razor that is a little more affordable, you can always just go with one that’s well-reviewed but affordable and upgrade later. Once you’ve got good quality clippers and a trusty straight razor (or shavette), you’re almost ready to rock!
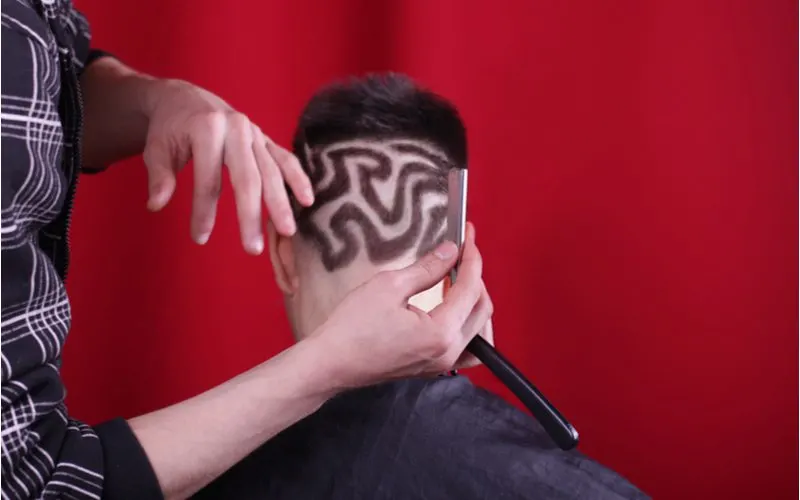
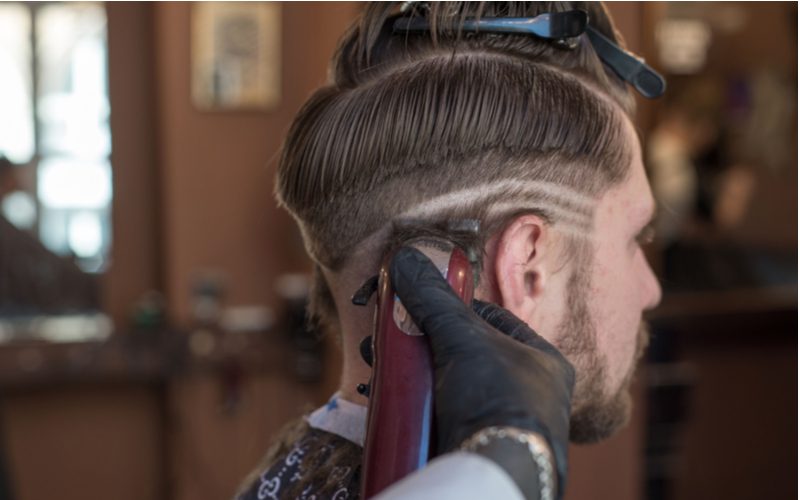
How to Shave Hairstyle Patterns Step-By-Step

Donenko Oleksii/Shutterstock
Ready to transform your haircut with cool shaved designs? Follow our step-by-step guide to do it right. Shaved patterns must be cut into very short, shaved hair to be visible.
You’ll want to begin by cutting your hair the way you want, ensuring you make the sides and back (or wherever you want your patterns) short enough to show off the design, but long enough to make a good contrast between the shaved areas and the short hair.
That’s usually a #2 or #3 clipper guard. Not sure how to cut a fade? Read this first: How to Do a Fade Haircut: Step-by-Step Guide.
You’ll also need to go ahead and choose the pattern or design you want to shave into your haircut. We recommend starting with something very simple, like rails (lines), to ensure a good result the first time.
You’ll Need
- Clippers with different guard sizes
- Straight razor with sharp blade
- Plastic cape or towel
- Hand-held mirror
- Ruler or stencil
- Clear shaving gel
Directions
Start by putting a barber’s cape or towel around your neck to catch the hair that falls. Position yourself in front of a good mirror so you can use your hand mirror to easily see what you’re doing around the sides and back.
Remove any clipper guard that may be on your clippers. You need the bare blades (which cut closest to the scalp) to shave precise designs. Plug in your clippers now if they’re electric.
Pick up a ruler, something with a straight edge, or a stencil to help you make the design even and (if it’s not a freestyle design) symmetrical. Place it against your head in the area where you plan to cut. This area should be pre-cut to a short length to make shaving the designs easier.
1. Create a Guide Line With Clippers
Turn on your clippers and point the “teeth” with the blades of the clippers at your head. For straight lines, use the entire head of the clippers with very light pressure.
Rather than dragging the clippers from side to side, use tiny lifting motions, then move the clippers over to extend the line as long as you want. Use your hand-held mirror to see the sides and back as you work.
For curved lines, use only the corner of the blade to create your guide line using the ruler or stencil you’ve picked. Do this in short, slow motions to keep the curve smooth. Using the corner will help you have more control over the shape of the curve.
2. Thicken and Sharpen the Lines
Once you have your basic lines or curves shaved in, you can come back through and use those guide lines as you thicken and sharpen the design. Make each line or curve as wide as you want now that you have a solid and smooth guide.
Flipping the clippers upside down will help you get any stubborn hairs that need to be cut against the grain.
3. Finish With a Straight Razor
With the complete designs in place, it’s time to clean it all up with a straight razor. Safety is key here, so only complete this step if you feel 100% confident. You can always go to a barber to get this done!
Apply a little clear shaving gel to make the design clearer. This makes it easy to spot any zones that need a touch-up or need to be sharpened a bit. The shaving gel also helps you prevent nicks and cuts from the sharp razor blade.
Hold the straight razor close to the blade for the best control. Angle it at about a 30 to 45 degree angle to cleanly cut the hair without pulling on it or cutting your skin. Hold the blade in line with the design and carefully apply light pressure while moving the blade back and forth to clean up the line.
When you’re finished, use a barber’s brush and a sprinkle of baby powder to remove excess hair and get a good look at your finished hairstyle pattern. You did that!
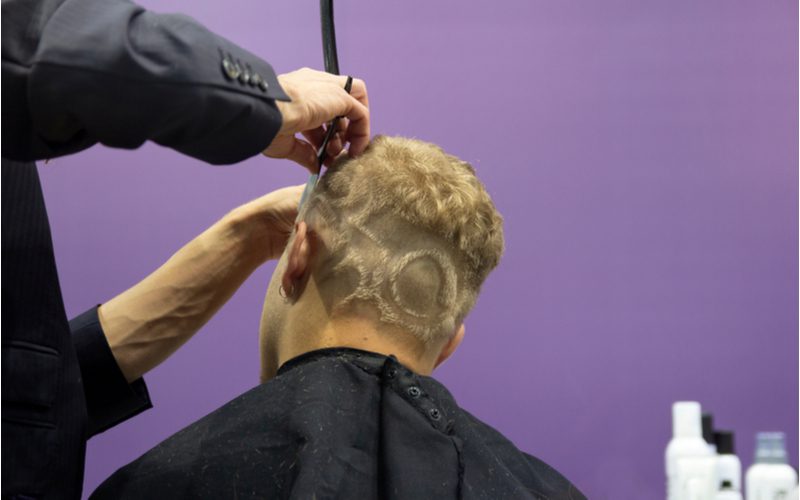
Things to Consider
DmyTo/Shutterstock
Before you get clipper-happy and turn your head into a work of original art, there are a few things you need to think about first. Read through this list to ensure you don’t end up regretting your choice to DIY your own shaved designs!
- Start simple and small. Skilled barbers have made images of intricate shaved hairstyle patterns go viral, and anyone can see how impressive those designs are. But if you’re a beginner, you want to start small and simple with hair designs. It’s better to have a simple triple-rail design that looks clean and perfect than a botched, intricate mess. Straight lines are easier than curves for beginners, so keep this in mind, too.
- Use the best equipment you can afford. We’ve listed our favorite options for clippers and straight razors above in the guide. You don’t have to use those specific models and brands, but whatever you do, don’t just grab the cheapest option available. Pick the best ones you can feasibly afford because they’ll last longer, cut cleaner, and be more comfortable to work with.
- Avoid designs in the back for your first time. Shaving designs into the back is probably the hardest maneuver for a person to DIY. If you are using a hand-held mirror in combination with a wall-mounted mirror to see the back, it’s still really difficult to coordinate your movements when you’re watching your reversed reflection. If you have a skilled family member or friend who can help you with the back, that’s great.
- Err on the side of caution. Using sharp blades on the delicate skin of your scalp is something that requires an abundance of caution. Start with a clear mind and make sure you’re fully awake. Work slowly, make small movements with the blades, and use light pressures as you cut. Take a quick break if your arm or hand feels tired as you work to ensure you don’t slip or mess up the lines.
- Know when to throw in the towel. If you’re really nervous about using a straight razor or worry about messing up your hair, know when it’s time to give up and call a barber. Some professionals do hair designs like these every single day and can have you fixed up in no time. If you’re not 100% confident in your ability to shave designs without messing up your hair or cutting yourself, just rely on a pro instead.
Hairstyle patterns give you a way to show off your individuality while rocking an impressive hairstyle that draws everyone’s attention.
Whether you’re excited to try classic, old school standbys like rails or something a little more intricate and skilled like freestyle gradient patterns, one thing is certain. Doing your own hairstyle patterns and designs at home requires good equipment, a steady hand, and lots of confidence.
If you feel you’re in over your head at any point and don’t want to visit a barber to finish it, you can always shave the designed areas closer to the skin to “erase” them.