Jump to:
Sometimes hair is prone to tangling or getting damaged as you sleep, making it hard to maintain its style. This is especially true for natural hair. Keep reading to learn how to wrap your hair to keep it in tip-top shape and combat breakage or dryness.
How to Wrap Your Hair in 6 Steps

New Africa/Shutterstock
If you’re considering wrapping your hair to prevent hair damage overnight, there are several ways you can do it. The condition of your hair affects how long this process takes, so it’s best to keep it as clean as possible before starting. — better yet, start with freshly shampooed and conditioned hair. After washing, take these steps:
- Part your hair into sections
- Wrap half of your hair with a comb or brush
- Repeat on the other side
- Secure your hair with a scarf
- Keep it dry until you’re ready to style it
Before you start wrapping your hair, ensure you have all the necessary supplies to complete this process. You’ll want to have everything within reach once you get into wrapping your hair.
Although your hair is unique, the process of wrapping your hair is virtually the same for everyone. First, you should thoroughly prepare your hair for wrapping. This process won’t take any less than five minutes, especially with longer, tangled hair, but be sure to take as much time as you need.
Step 1: Moisturize or Wash Your Hair
Although a complete wash isn’t mandatory before wrapping your hair, it’s ideal for giving your hair enough moisture to preserve it for the next several hours. In addition, cleaning it makes this process much easier and enhances the natural oils in your hair.
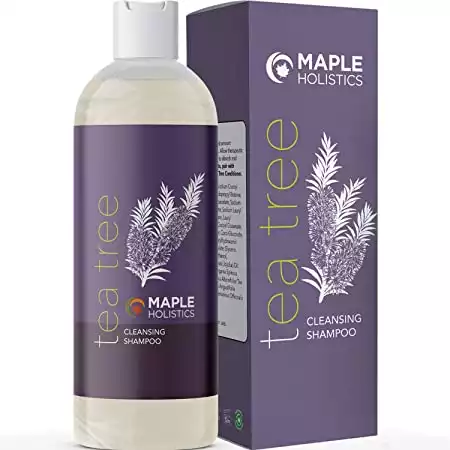
- Extremely effective
- Overall positive reviews
- Paraben, BPA, and sulfate free
- Strong tee tree oil smell
- Have to let sit on hair
- Not a substitute for conditioner
Look for shampoos, standing conditioners, or moisturizers with natural oils for the best results for preparing and rejuvenating your hair without damaging it. Some examples include argan oil, coconut oil, and jojoba oil.
Depending on your hair’s length or texture, you should let it moisturize for around 20 minutes and rinse it out with cool water to seal your hair’s moisture and preserve its natural protective oils. Conversely, using hot water removes these oils and dries out your hair faster.
When moisturizing your hair, try to keep it as smooth as possible to eliminate the matting, tangles, and knots that may try to form. Do this by applying the conditioner at the roots, massaging your scalp, and allowing the product to work down to the tips of your hair. Avoid slathering the conditioner on the ends of your hair and rubbing it in, as this can create tangles.
If you washed your hair, use a towel to remove enough water to keep it damp. You can also use a cool blow dryer if you want to remove your hair’s dampness before brushing and wrapping it.
Read Next: Our Favorite Conditioners
Step 2: Part Your Hair Before Brushing
Once you’re sure your hair’s soft and tangle-free, take a comb and part your hair into two even halves to simplify the brushing and wrapping process. Plastic or wooden fine-toothed or rat-tail combs work best for precise parting and smoothing that matches your style.
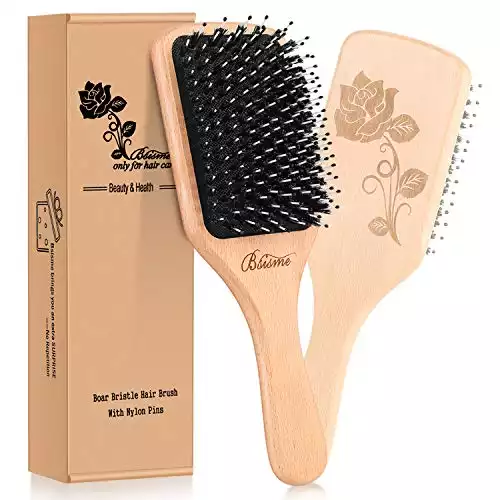
- Comes with a scrunchie and a comb
- Very sturdy design
- Has both boar bristles and nylon
- Awkward handle
- Bristles might pull out fine hair
- A bit hard to remove excess hair
Save your paddle brush for sweeping your hair in an ideal direction as you wrap it around your head. Using this brush for parting it into sections results in uneven sectioning.
The best place to start parting your hair is the top of your head. After finding an ideal division line, brush half of your hair in even directions. One standard method many people like to use is brushing the sectioned hair to the front of your face and swooping it to the side.
Some factors that affect how long it takes to brush it in place include:
- Your hair’s thickness: Thicker hair may need more hairpins or bobby pins to hold it in place while dividing each section.
- Your hair’s length: You can use your hands to flatten bumps in longer hair as you brush and wrap it around your head. Your hair’s length also determines how many sections you need to divide before wrapping and pinning it down.
- Your hair’s quality: Hair with split ends needs additional treatment before parting it for your hair wrap. Smoothing them out with moisturizer or trimming the dead ends helps you save extra time while preserving your hair’s style.
Read Next: Our Favorite Hair Brushes
Step 3: Wrap the First Half of Your Hair
After feathering out your hair into sections, start with either side. Next, use a paddle brush to smooth larger sections of hair. In addition to smoothing, brushing also distributes your hair or moisturizer’s oils from its roots to its tips.
As you brush your hair, try using your free hand to hold it in place before securing it with a bobby pin. You might need to use more pins if you have long hair that’s hard to control.
Another technique you can try is by taking the longest ends of your hair and measuring it against the side of your head near your ears; you can use that as a reference point when placing your hairpins.
Use sweeping circular motions to brush each region of your sectioned hair until you reach the back of your head. You might also want to consider brushing until you reach your hair’s farthest point. The technique you choose will depend on your hair’s length.
Step 4: Repeat the Wrapping for the Other Half of Your Hair
After you finish wrapping the first section of your hair, repeat this process on the opposite side. You should continue brushing in circular motions from the front to the side and smooth it out as much as possible.
As you wrap the remaining hair around your head, use bobby pins to hold the hair together as both parted sections meet.
Step 5: Secure Your Wrapped Hair with a Scarf
After wrapping each section of your hair and flattening any remaining pieces, you’re ready to wrap your hair in a scarf. The most common materials you’ll find are made from satin or silk.
Although both materials work well when keeping your hair smooth and preventing damage, satin is the best option for preserving your hair’s natural oils while you sleep.
Spread the scarf across the top of your head and wrap each end around the side of your head. After crossing both ends in the back, pull them towards your forehead and tie a knot. Avoid making it too tight to let your hair breathe and keep its oils from clashing with other surfaces.
Push any remaining hair strands beneath the scarf to ensure that every inch of your hair gets equal treatment as you lock in its moisture. Alternatively, you can use a satin bonnet to retain your hair’s moisture and protect it from frizz or split ends.
Step 6: Post Wrap Treatment
After placing the scarf around your head, you need to wait several hours until your hair completely dries. Depending on your hair’s length, the amount of time your hair takes to dry may differ from someone else.
Before removing the scarf, ensure you’re ready to brush and style your hair to avoid exposing it to unwanted humidity. It’s always better to wait a bit longer than to ruin it as soon as you wake up.
After grabbing your comb or brush, untie your scarf and begin removing the hairpins and unwrap each hair section. Following that, brush your hair in the opposite direction you wrapped it to smooth it in place and keep it from knotting.
This process lets you keep stray strands from sticking out when releasing your hair and restyling it. Once you brush everything out, you’re free to continue with your morning hair routine.
Read Next: Best Hair Masks
Things to Consider When Wrapping Your Hair

Ahmet Misirligul/Shutterstock
Before learning how to wrap your hair, there are several factors you should consider, as they’ll help you decide whether or not this hair technique will work for you.
- How sensitive your hair is to frizzing: Frizz typically forms because of dryness and friction in your hair cuticles. Curly and wavy hair are more prone to developing frizz faster than naturally straight hair.
- How much moisture you want your wrapped hair to seal: Satin and silk scarves work best for keeping your wrapped hair’s moisture balanced, but satin is more suitable for keeping outside moisture away from your hair to minimize breakage, while silk focuses on keeping your hair smooth and moist with natural fibers.
So, How Do You Wrap Your Hair?
Wrapping your hair is an excellent way to preserve its volume and natural oils without damaging it. Although it might take time to perfect how smooth you can comb your hair and secure it with a scarf, following these steps should simplify this process.
By learning the proper techniques of how to wrap your hair, you can keep your hair looking its best every day.


