
Jump to:
Sometimes, it can be hard to achieve those fabulous, salon curls that we all want for an exciting night out. Never struggle with your curling iron again! Consider this your definitive guide for how to use a curling iron with a clamp, so you can feel like a movie star.
If you’ve never curled your hair with an iron, don’t worry, it’s easier than it seems; we’ll walk you through the entire process.
Using a Curling Iron With a Clamp: A Summary
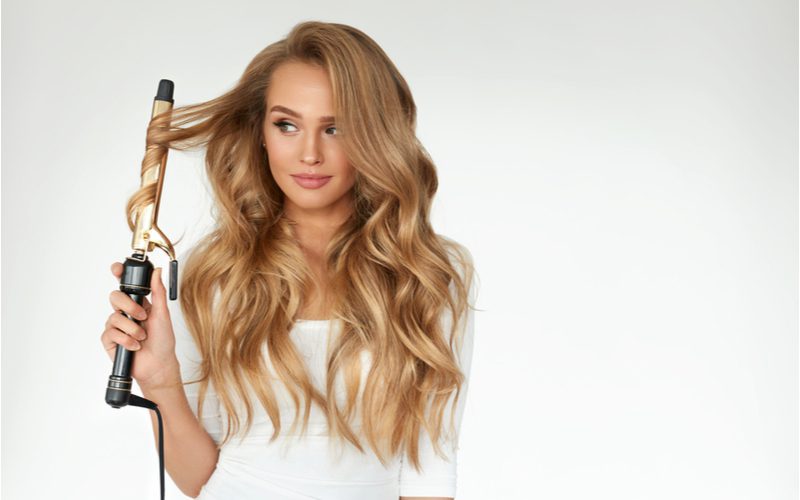
Puhhha/Shutterstock
A crucial part of curling your hair is the preparation and caring for the curls as you go! Below is a summary of the steps for both methods. But we’ll dive deeper into each step further on in this article.
- Heat the iron.
- Prepare your hair.
- Wrap your hair around the iron either inside or outside of the clamp.
- Pinup your hair as you go.
- Allow hair to cool, and then remove all pins and spray.
- (Optional) Manipulate and shake out your curls if desired.
Keep reading for an in-depth, step-by-step guide to curling your hair with an iron that has a clamp. There are two ways that you can do this that we’ll highlight below!
How to Use a Curling Iron With a Clamp
Check out these two methods for curling your hair with an iron and clamp.
Method 1: Wand Curling
We recommend wand curling for people that want a more natural curled look and like to style their hair with different sizes and shapes of curls.
1. Heat Iron
Plug your iron into an outlet near a mirror so you can watch yourself while you curl your hair. Many people always set their wand to the highest heat setting, but it’s best to set the heat according to your hair thickness.
Thicker hair will need more heat to hold the curl, while thinner hair can become damaged if the iron is at maximum heat.
If you plan to do large, thick curls set the iron to maximum heat. But if you want the result to be smaller ringlets, set your iron to medium or medium-high heat.
2. Prepare Your Hair
To avoid damage and keep your hair healthy, you must take the necessary steps to prepare your hair. First, you should brush out your hair thoroughly and gently. You can use a comb, but we recommend a soft brush to detangle any knots.
Next, you need to apply a heat-protecting spray. Many great heat-protecting sprays on the market will seal in moisture and prevent frizz, acting as a barrier between your hair and the styling tools.
Some people neglect heat sprays and consider them useful, but professionals highly recommend them when styling your hair with a heated appliance. Once your hair is smooth and ready to curl, section it off.
The more hair you have, the more sections you should separate. But the recommended number is four sections for the average head of hair. You can use hair clips, elastics, bobby pins, or whatever you have to separate your hair.
3. Use the Iron
For this method, you should have the clamp closed. Wrap your hair around the entire iron wand and the clamp. If you want big, flowing curls, use the clamp to make the wand thicker, which will result in wider curls.
The clamp when doing this method will allow you to customize your hairstyle to the size you want. Curl one section at a time, holding your hair on the iron for five to ten seconds.
Any less will result in a loose curl, and any more could result in damage to your hair. We recommend counting out loud, so you don’t count too fast. It is tough to re-curl a disappointing curl.
4. Pin Your Curls
Many people skip this step, but it is super important if you want your curls to remain tight and last a long time. Skipping this step can result in your curls falling out before you even finish doing your makeup!
Using bobby pins or butterfly clips is the best way to pin up your curls. After using the iron and creating a curl, use your fingers to wrap the curl up into a circle you can pin to your scalp.
The more attention you pay to this step, the better your curls will be when you’re done. Do not do five curls and then pin them up, the key is pinning up the curl when the hair is still hot, so it cools in the ideal curl shape.
If you have all day to get ready for an event, leave your curls up as long as possible so they’ll hold the shape for longer.
5. Let Cool and Let Down
Once you have curled all sections of your hair, leave it up in the pins or clips. Wait until your hair is completely cool, this should only take about five or ten minutes. Once your hair is cool, you can spray it with a quality hairspray if you want tighter curls.
If you want a more natural look, remove all of the pins, let your hair down, and then spray it. A little hairspray goes a long way, so don’t overdo it.
6. Manipulate Curls (Optional)
Step 6 is optional but we recommend doing it as it completes your curly look. Once you have used the hairspray, do a dramatic hair flip to separate the curls, so they look more natural.
You can also use your fingers to gently pull curls apart, so they don’t look too perfect, giving away your styling secrets.
Method 2: Spiral Curling
We recommend spiral curling if you want tighter, longer-lasting curls.
1. Heat Iron
This process is the same as the first method, however, for this method, the curls will come out tighter. So, you want to heat the iron below the maximum setting, either medium or medium-high.
2. Prepare Hair
For this method, the hair preparation is the same. Use a heat protectant spray, especially on the ends of your hair. Then, make sure you brush or comb out your hair gently but thoroughly.
3. Use the Iron
This step is where our two methods differ. For this method, open the clamp and slip the top of the strand into the crevice of the clamp. Try to wrap your hair as close to the root as possible without burning yourself.
Wrap your hair tightly around the wand, and then close the clamp firmly. Many people prefer this method because it results in tighter, longer-lasting curls. After all, both sides of the hair had heat applied by iron.
Hold the clamp tightly for five to ten seconds and slowly open the clamp and release the hair. The curl should be a tight spiral rather than a billowing look that you can get from the wand method.
4. Pin the Curls
When doing the spiral method, it is best to use bobby pins. The pins will keep the curls as tight as possible. Once again, pin the curls immediately after using the iron on them to help hold the shape.
5. Let Cool and Let Down
Most people using the spiral method want tight, tiny ringlets. For this, we recommend using hairspray while the curls are still pinned up. Once the hair has completely cooled, you can remove all the bobby pins and shake out your hair.
6. Manipulate the Curls (Optional)
For this method, don’t manipulate your curls with your fingers, as this defeats the purpose of the tight ringlets. But we still recommend doing a quick hair flip to relax your look.
Frequently Asked Questions
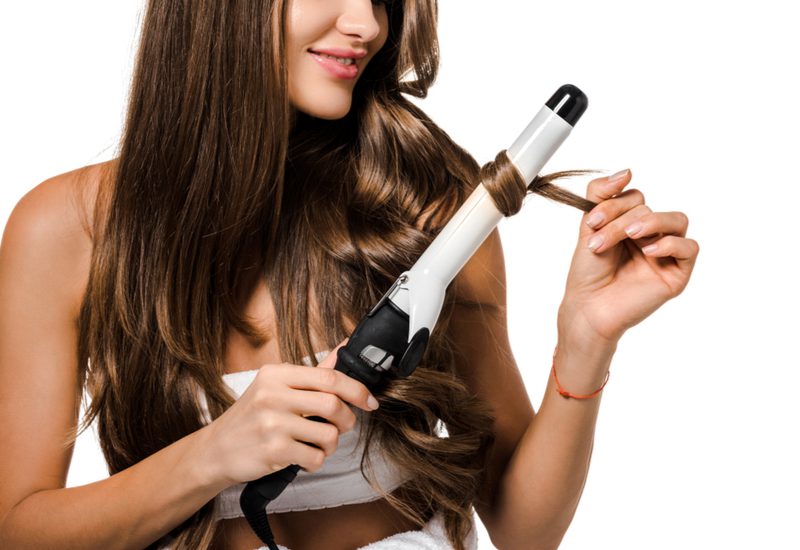

LightField Studios/Shutterstock
If you have more questions about using a curling iron and how to prepare your hair, check out these frequently asked questions.
Can I use hand rollers to curl my hair?
Yes, you can use hand rollers. Hand Rollers are the old-fashioned way of curling your hair and can be a soothing process. You also don’t run the risk of burning your fingers, forehead, or neck.
To properly use hand rollers, you should shower and then blow dry your hair in the hottest setting. Remember to apply heat spray before applying any heat to your hair!
While your hair is still hot, twist your hair around the curlers and then secure the end of each section with a bobby pin. Leave these in your hair until your hair is cool to the touch; 15-30 minutes is usually enough time.
Spray your hair with hairspray, and then gently remove the hand rollers. We do not recommend manipulating curls done with hand rollers as they’re more likely to fall out after an hour or two once tossed.
What should I look for in a curling iron?
There are two main things to consider when buying a curling iron with a clamp. The first is the heat setting options. You don’t want to buy one that is simply on or off. As discussed, different hair and different styles require varying temperatures.
The second aspect to look for is the barrel size. The clamp gives you more flexibility with the size of the curl, but you should still consider what styles you want to achieve. The smaller the barrel, the tighter the curl.
Do I have to use hairspray?
No, but don’t be surprised if your curls lose their shape within a few hours. Hairspray helps hold the shape of the hair strands so that you can look fabulous all day and night. Many people do not like the crunchy, stiff feeling they get when using the hairspray, which is understandable.
Can I curl my short hair?
Absolutely! As long as your hair is long enough that it can wrap around the wand without burning your neck or forehead, you can refer to this guide!
For people with short hair, we recommend the wand method. The wand method would look more natural and work well with a short haircut. It is also important to wrap your curls up tightly, or you may end up with a wavy style.
Can I use hairspray as a heat protectant?
No, you should not do this. Hairspray combined with the heat from the iron will likely result in dry hair and possibly damage. Hairspray does not have the same qualities as a heat protectant and cannot be treated as a substitute.
Some people may recommend spraying before curling, but this is only acceptable if you use a heat protectant first. Nevertheless, we recommend holding off on the hairspray until after you use the iron.
So, How Do You Use a Curling Iron With a Clamp?
By now, you should be ready to create some luscious curls whether you want adorable little ringlets or massive flowing hair. For some final advice, we want to remind you to watch your fingers and your neck.
A curling iron can result in a nasty burn. Keep this guide handy, so you never forget how to make your hair look incredible, and don’t forget to use the heat spray!