
Jump to:
Whether you’re headed to the gym or on a date, buns are a stylish way to wear your hair. We’ll teach you how to make cute messy buns that’ll “wow” anyone you pass. Read on to see the styles and how to make them.
Making Cute Messy Buns: A Summary

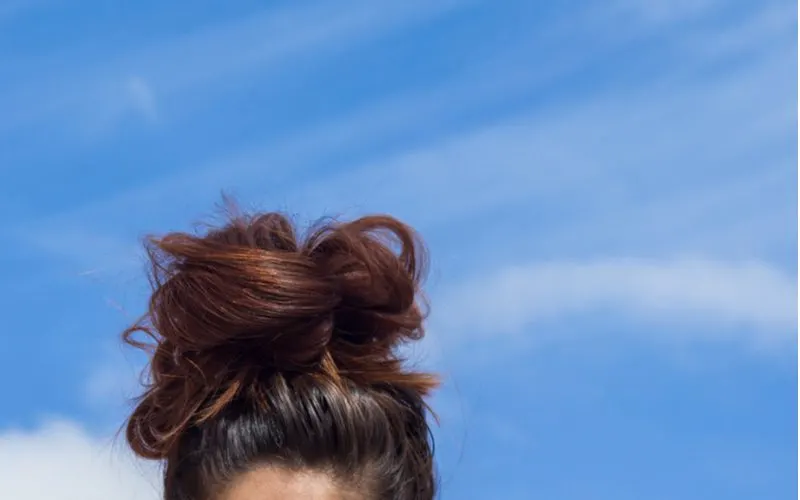
Albach/Shutterstock
Here’s the good news: You don’t need to be a hairstylist to make a cute messy bun. Instead, all it takes is a bit of motivation and following the five simple steps below.
- Gather your materials
- Make a ponytail
- Form a bun around your ponytail
- Arrange strands of hair
- Use bobby pins for support (optional)
Are you ready to learn how to make cute messy buns? We promise to make it easy on you.
How to Make a Cute Messy Bun in Five Easy Steps
We guarantee you that you’ll turn heads if you follow the steps below.
1. Get Your Materials Together
It may come as a shock to you, but by “getting your materials together,” we mean leaving your hairbrush behind. Furthermore, the best messy buns turn out well on hair that hasn’t seen shampoo in the past day or two.
By not washing your hair daily, you’ll get the added benefit of keeping more oils on your scalp, helping to maintain a shiny and supple head of hair. So, all you need to create a messy bun are your fingers and a comfy hair tie.
When choosing a hair tie, you’ll want one that offers excellent elasticity, especially if you have long, thick hair. Furthermore, selecting a hair tie with tug-free features is crucial — we don’t want you damaging your hair in the process of twisting and turning it into your messy bun.
In fact, the American Academy of Dermatology states that using covered rubber bands made for hair can help prevent hair loss.
Furthermore, if you have thin hair, consider prepping your hair with a dry shampoo or texturizing spray. That way, you’ll benefit from the full look that people with thick hair get to rock when wearing messy buns.
2. Make a Ponytail
If you thought that the best messy bun wouldn’t require something so formal as starting with a ponytail, think again. Ponytails are the foundation for a messy bun because they offer a base for you to form your bun around.
Best of all, when you’re first embarking on making your cute messy buns, you don’t have to start from scratch — simply undo your bun down to the ponytail and begin again from there.
To make a ponytail, run your fingers through your hair, gradually gathering it at the back of your head. Don’t worry about the inevitable bumps that will form along the way, given that you didn’t comb your hair.
After all, those bumps will help complete the messy bun look. Once you gather all your hair, use your hair tie to secure the ponytail in place. Feel free to play around with the height of the ponytail.
If you have short hair, you’ll likely need to keep your ponytail low to avoid your hair pulling out of its grip.
In contrast, people with longer hair will have more room to play with how high they want their ponytail to go — you can even make a ponytail to the side of your head if your goal is a unique messy bun look.
You should ensure the hair tie has a moderately tight hold. If it’s too loose, it could cause your bun to become undone. If it’s too tight, it’ll flatten the bumps that help with the messy appearance you’re trying to achieve.
Optional Ponytail Variation
If you have thin hair and don’t have dry shampoo or texturizer on hand, you can manually volumize your ponytail by using hairspray and a fine-tooth comb. In this case, once you’ve tightened your ponytail, apply some hairspray to a fine-tooth comb.
Then, tease the ponytail. You won’t be able to do so starting at your real roots, so consider your hair tie as the “roots.” Start from there and work your way down to the tips.
Given that hairspray is an aerosol, it has harmful effects on the ozone layer. So, if you’re concerned about the environment, you can use a small amount of mousse or hair paste for a relatively similar hairspray effect.
3. Form the Bun Around Your Ponytail
You can use two different strategies for this step, depending on the look you’re going for. We’ll break down both of them for you.
Option A: The Spin
Using the spinning technique is the fastest and easiest way to create a messy bun. Start by placing your index finger at the base of your ponytail by the hair tie. Then, gently move your index finger in a circular motion so that your hair twists into a single strand.
Once you’ve twisted your ponytail down to the very bottom, wrap it in a circle, using your hair tie as the base. When you near the end of your hair, pinch the tip and use your other fingers to locate the hair tie beneath your circle of hair.
Then, tuck the tip of your hair under the hair tie, pulling it through a bit to ensure it stays in place. By doing this, you’ll create a cute messy bun without anyone being able to see what’s holding it in place.
When preparing your hair for spinning, practice how tight or loose you want it. We recommend using a medium to lose spin. That way, you’ll achieve a messier look.
Option B: The Loop
If you prefer the look of a wispy messy bun, you can form it as part of your ponytail. To do so, don’t pull your hair all the way through the last time you’re going to tighten up your ponytail.
Instead, leave your hair about three-quarters of the way through the last hair tie twist, and let go of the hair tie. That way, it holds your hair in place. At this point, you’ll have a large loop of hair.
You can then arrange the loop by pulling tugging at it to make it larger or gently pulling at its sides to widen it. The result will be a U-shaped messy bun versus the circular-shaped messy bun in the option above.
The loop is an ideal messy bun style for people with short hair, as it avoids wasted length by twisting or circling your hair.
In contrast, this option tends not to be best for people with extremely long hair since the loop will droop down. Then again, if you enjoy making fashion statements, this could be the perfect look for you.
4. Arrange Your Strands of Hair
As easy as messy buns are to make, the cutest buns involve some effort to make them look perfectly messy. It’s contrary to common sense, we know.
So, once you’ve secured your bun with your hair tie, start pulling at some of the strands — the last thing you want is your hair lined up in an even bun.
It’ll likely take some practice to figure out which hair strands work well for your bun. For example, if you have long hair, having those strands hang down at the back of your head might not create as attractive of a look.
So instead, try accenting the shorter hair strands you may have that frame your face. If you mess up, don’t get frustrated. Instead, simply tuck any strands you don’t like back into the hair tie.
By doing so, you may discover that the look of hair strands crisscrossed into your hair tie was precisely the thing you needed to complete your cute messy bun look.
5. Use Bobby Pins for Support
You don’t have to use bobby pins to make a messy bun. However, if you feel your hair tie loosening from sticking so many strands of hair into it, you can use bobby pins to hold them in place instead.
Below are some tips for using bobby pins to ensure your cute messy bun stays the center of attention and not the other way around.
- Insert the wavy side of the bobby pin against your scalp
- Keep the bobby pin angled towards the top of your head
- Use a second bobby pin for support if you’re trying to hold a lot of hair
By following these tips, you can expect your bobby pins to help hold your messy bun in place all day. You can also purchase wider bobby pins for thick hair to prevent them from falling out during the day.
That said, bobby pins can sometimes work to your disadvantage when you’re going for the cute messy bun look.
Often, messy buns begin looking even better than in the morning as the day goes on since head movement and a breeze can add to their appearance. So, by using bobby pins, your hair may have less flexibility to have a more natural messy look.
Frequently Asked Questions
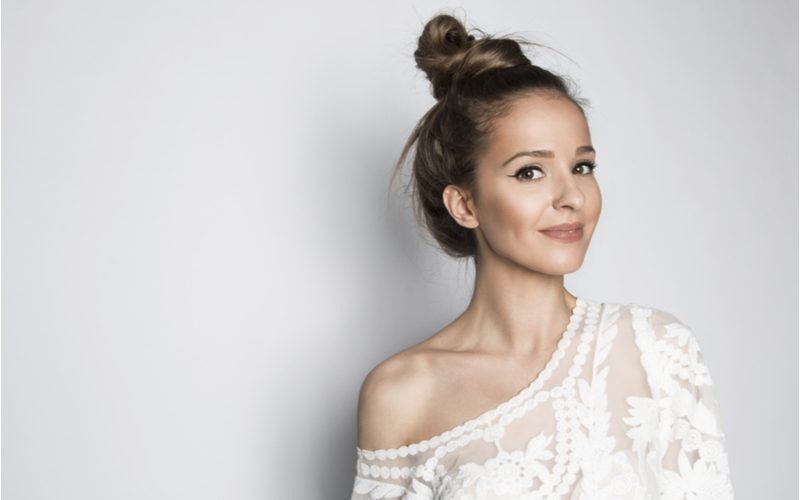
Vilenija/Shutterstock
Do you still have questions about how to make cute messy buns? We’ve got the answers for you below:
What do I need to make a messy bun?
You only need a hair tie and your fingers to make a messy bun. However, you can also use dry shampoo or texturizing spray for added style.
How do you do a messy bun without bobby pins?
To make a messy bun without bobby pins, tuck the end of your hair in the same hair tie you used to make your ponytail. Make sure you pull the hair tie taught to ensure your hair stays in place.
How do you do a messy bun with thin hair without a donut?
To make a messy bun with thin hair and without a donut, start by using a texturized spray in your hair. Then, tie your hair into a ponytail, spin your hair into a single strand, and wrap your hair around the ponytail. For added support, use bobby pins to hold your hair in place.
How do you make a messy bun with short hair?
Make a messy bun with short hair by forming a ponytail towards the base of your neck. Then, create a single loop using the hair tie from your ponytail to hold your hair in place.
How do you do an easy bun hairstyle?
To do an easy bun hairstyle, form a ponytail with a hair tie and wrap your hair around it. Use the hair tie to hold your hair in place. If you want to create a messy look, pull out select strands of hair.
So, How Do You Make Cute Messy Buns?
Cute messy buns are easy to make with the help of a hair tie and a day or two without washing your hair. We encourage you to have fun with it and practice pulling out different strands of hair until you create your favorite messy bun look.