
Jump to:
If you’ve been itching for a change from your natural curls, you’re not alone. Fortunately, relaxing your hair isn’t as complex as it might seem. Keep reading to learn how to skip the salon and do the process at home on your own.
Relaxing Your Hair: A Summary

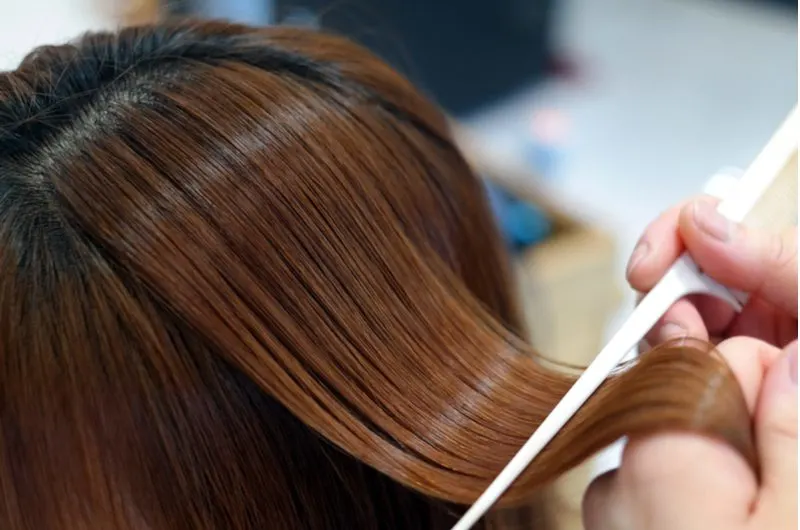
Hyung Min Choi/Shutterstock
Relaxing your hair might seem like an intimidating task to tackle on your own. However, it’s actually relatively easy to do if you follow a few basic steps:
- Gather Your Materials
- Prepare Your Hair and Scalp
- Do a Strand Test
- Protect Your Skin and Clothing
- Divide Your Hair
- Apply Your Preferred Relaxer
- Rinse, Wash and Condition Your Hair
- Style and Care for Your Hair
So, are you ready to get started relaxing your hair? Then keep reading as we walk you through 8 easy steps to relaxing your hair.
How to Relax Your Hair in 8 Easy Steps
Relaxing your hair at home isn’t a terribly complicated process, so you should be able to manage to do it at home in the comfort of your own bathroom.
If you’ve ever dyed your hair at home, you’ll find that the process is quite similar. However, it’s essential you follow all steps closely to avoid over-processing your hair or causing unnecessary damage.
There are many benefits to relaxing your hair at home, including cost savings and the convenience of not having to make an appointment at a salon. Take a look at the steps outlined below, then you can decide whether or not a home-relaxer is for you.
1. Gather Your Materials
The first step to properly relaxing your hair is to gather the appropriate materials. The last thing you want is to get started, only to realize you’re missing key items.
So, take time to gather up the following supplies before you get started:
- Preferred relaxer
- Towels
- Neutralizing shampoo
- Conditioner
- Latex or rubber gloves
- Bowl
- Rattail comb
- Wide-tooth comb (for detangling)
- Clips (for sectioning hair)
- Protective cream for skin
- Hair color brush
- Styling cape
- Timer
You’ll probably have many of these supplies at home already. When you head to the store to choose a relaxer, remember the following:
- Most hair types take a regular strength relaxer just fine
- Fine, dyed, or damaged hair does best with a medium-strength relaxer
- Thick or coarse hair usually calls for a super or extra strength relaxer
If this is your first time relaxing your hair at home, you can check with your regular stylist to find out if there’s a brand they think works best for your hair type.
Also, keep in mind that no-lye relaxers tend to be easier on your scalp than traditional lye relaxers, which can be quite irritating.
2. Prepare Your Hair and Scalp
Preparing your hair for a relaxer is probably the most time-consuming part of the relaxing process. You’ll need to start preparing several days in advance to ensure the best outcome.
The most important preparation step is to avoid washing your hair for at least 7-10 days before applying your relaxer. Even gentle shampooing can irritate your scalp and cause burning when you apply the relaxer.
It’s also a good idea to skip workouts in the days leading up to your relaxer. Not only can sweat irritate your scalp, but it can also cause your hair and scalp to feel dirtier, which might be a bit frustrating.
3. Do a Strand Test
When relaxing your hair at home, it’s important to ensure the relaxer won’t cause any adverse reactions. The most common negative effect is an allergic reaction, which can happen even if you’ve used a product before.
To do a proper strand test, simply apply your relaxer to a small section of hair the day before you plan to apply your relaxer. Then, monitor your hair and scalp for any sign of an adverse reaction.
4. Protect Your Skin and Clothing
Relaxers are made up of chemicals that can irritate your skin and damage your clothing. The best way to avoid any damage is to take a few precautions to keep your relaxer away from your skin and clothes.
Plastic or rubber gloves are an absolute must when relaxing your hair. They’ll allow you to handle the relaxer without having to worry about the chemicals irritating the skin on your fingers or palms.
A hairdresser’s cape is the simplest way to keep the relaxer away from your clothing. However, you could also wear old clothing if you don’t have a cape handy.
Finally, apply a protective cream to your hairline, scalp, and around your ears to minimize the relaxer’s direct contact with your skin. You can pick up a protective cream at the store or just apply a bit of Vaseline or petroleum jelly.
5. Detangle and Divide Your Hair
Once you start applying your relaxer, you’ll want to make sure you’re spreading it evenly. The best way to do that is to detangle your hair, then section it into 4-6 evenly-divided sections.
Make sure the sections are divided by straight lines, avoiding any zig-zags. A rattail comb will be your best friend for this step. Use the handle to draw even sections on the top, sides, and back of your head. Then, secure each section with a clip.
Avoid using hair elastics, especially those with metal pieces, as they could be difficult to remove. Hair clips come out quickly and allow you to control where the hair falls.
6. Apply Your Preferred Relaxer
You’ll need to mix up your relaxer before applying it to your hair. It’s particularly important that you follow the manufacturer’s instructions for this step because mixing chemicals incorrectly can damage your hair.
Using a plastic bowl, mix the relaxer based on the included instructions. Then, working in small sections, apply the relaxer to your hair with a color applicator brush, being careful to avoid your scalp.
You should break each larger section of hair into smaller sections to ensure the relaxer gets evenly distributed. This is another point where the rattail comb will come in handy. After you apply the relaxer, use the back of your rattail comb to smooth the relaxer over each section of hair.
Don’t use the teeth of the comb to distribute the relaxer. Once you’re happy with the relaxer’s coverage, double-check the directions and set a timer based on the manufacturer’s specifications.
Don’t leave the relaxer on your hair past the specified time, though. If you do, you’ll risk overprocessing your hair, which can lead to poor elasticity and lack of body.
Note: If you’ve never relaxed your hair before, you’ll apply the relaxer all over. However, if you’re simply relaxing new growth, take care to only apply the relaxer to unrelaxed hair to avoid overprocessing.
7. Rinse, Wash, and Condition Your Hair
When your timer goes off, it’s time to rinse. This is one of the most important steps because it’s when you halt the chemical reaction that’s relaxing your hair. Allowing the chemical reaction to continue can result in over-processed hair, so don’t skip any part of this step.
Don’t reach for the shampoo just yet, though. First, you’ll need to rinse the relaxer out of your hair. Let warm water run over your hair for at least 5 minutes to ensure you’ve rinsed away as much of the relaxer as possible.
It’s imperative that you do a good rinse before shampooing. After you’ve rinsed the relaxer from your hair, massage a dollop of conditioner into your hair, ensuring you thoroughly cover every section. This will help reset your hair’s pH.
You want to condition before your shampoo because your hair’s cuticle will be open, making your conditioner more effective than if you wait. Then, rinse the conditioner out right away. Once you’re done conditioning, it’s time to break out the neutralizing shampoo.
A neutralizing shampoo works differently than standard shampoo because it halts any remaining chemical reaction in your hair. So if there are any chemicals left in your hair after your rinse, the neutralizing shampoo will take care of them.
8. Style and Care for Your Hair
After you’ve washed the neutralizing shampoo from your hair, you can dry and style it as usual. Since your hair sustains quite a bit of damage when you relax it, you should try to minimize heated styling tools.
Use a blow dryer at low heat, and avoid cranking up the temperature on your straightening iron.
To properly maintain your relaxed hair, you’ll need to do a touch-up every 8-10 weeks. That’s the point when you’ll start to see new growth, and you’ll be able to easily apply relaxer to only the unrelaxed areas.
Frequently Asked Questions

SvetlanaFedoseyeva/Shutterstock
Relaxing your hair may not be a very hard task, but you might still have questions about the process. So here’s a bit more information about the relaxing process:
Is There a Healthy Way to Relax Your Hair?
Relaxer is quite damaging to your hair, so you should skip hot styling methods when possible. Instead, sleep with a silk scarf to keep your hair flat or apply a leave-in conditioner to smooth away any frizz.
Can You Relax Dirty Hair?
Most stylists recommend that you avoid washing your hair for at least a week before applying a relaxer. Similar to dyes, dirty hair will actually take the relaxer better than clean.
Is a Relaxer a Perm?
A relaxer is a type of perm. Perms, or permanents, chemically treat hair to alter the shape and style. The main difference between a typical perm and a relaxer is that a perm is usually done when someone wants curly hair instead of straight.
Can Relaxed Hair Go Back to Natural?
Hair relaxer permanently straightens your hair, so the treated hair won’t return to its normal style. To get your natural look back, you’ll need to grow out the relaxed parts and cut your hair at the demarcation line between relaxed and natural locks.
Should I Oil My Scalp Before Relaxer?
Protecting your pre-relaxed hair is important to ensure the relaxer takes to your hair well. You can protect your hair and scalp by oiling your scalp and any parts of your hair that you’ve already relaxed before you start applying a new relaxer.
So, How Do You Relax Your Hair?
You can easily relax your hair by following the 8 simple steps outlined here. Take care to follow the instructions that come with your relaxer to avoid any damage. And don’t forget–if you have any concerns about the process, reach out to your hairdresser for assistance.